Add TA692FC-L-5 to ThingsBoard
Tip
This section applies to the situation where you add a TA692FC-L-5 to the ThingsBoard PE. It implement two-way communication between a TA692FC-L-5 and a ThingsBoard PE.
Only ThingsBoard PE supports Platform Integrations feature.
Tip
If you only need one-way communication from TA692FC-L-5 to ThingsBoard, you can use chirpstack v3 + ThingsBoard CE or chirpstack v4 + ThingsBoard CE.
Refer to ThingsBoard getting started for ChirpStack v3 and ThingsBoard Integration for ChirpStack v3 .
Refer to ThingsBoard getting started for ChirpStack v4 and ThingsBoard Integration for ChirpStack v4.
Introduction
Note
The frequency of LoRaWAN device and gateway must match!
Warning
ChirpStack v4, the latest version, doesn’t handle downlink data from ThingsBoard PE v3.5.x.
The ChirpStack open-source LoRaWAN Network Server stack provides open-source components for LoRaWAN networks. After integrating ChirpStack with ThingsBoard, you can connect, communicate, process and visualize data from TA692FC-L-5 thermostat in the ThingsBoard IoT platform.

Item |
Description |
|---|---|
LoRaWAN Device |
TA692FC-L-5, Frequency 868 MHz* |
LoRaWAN Gateway |
MTCAP-868-041A, Frequency 868 MHz* |
LoRaWAN Network Server |
ChirpStack v3** |
LoRaWAN Application Server |
ThingsBoard PE v3.5.x** |
Prerequisites
Tip
You need a ChirpStack instance that can be accessed by your ThingsBoard PE instance.
If your ThingsBoard PE instance is installed in a LAN, you may also install a ChirpStack instance in the same LAN.
If your ThingsBoard PE instance is installed in the cloud, you may also install a ChirpStack instance on the corresponding cloud host.
Obtain the following TA692FC-L-5 LoRaWAN Paramters from your equipment vendor.
Item
Paramter
Model
TA692FC-L-5, Frequency 868 MHz
LoRaWAN
Class C
EU868 band
868.1MHz ~ 868.5MHz
DevEUI/AppEUI/JoinEUI*
YOUR_DEV_EUI, eg: 00:12:BD:FF:FE:02:AD:04
AppKey/Application Key/Network Key*
YOUR_APP_KEY, eg: 72357538782F413F4428472B4B625065
Note: These parameters are different for every thermostat.
- Setup the MTCAP-868-041A
- Install a ChirpStack v3 instance on
Amazon AWS, or
Microsoft Azure, or
Google Cloud, or
Debian/Ubuntu, or
- Subscribe or install a ThingsBoard PE instance
Step 1. MTCAP configuration
Step 2. ChirpStack configuration
Step 3. Integrating ChirpStack with ThingsBoard PE
Refer to ChirpStack Integration.
Step 3.1 Uplink Converter
Before creating the integration, you need to create/import an Uplink converter in Data converters. Uplink is necessary in order to convert the incoming data from the device into the required format for displaying them in ThingsBoard. To view the events, enable Debug. In the function decoder field, specify a script to parse and transform data.
NOTE Although the Debug mode is very useful for development and troubleshooting, leaving it enabled in production mode may tremendously increase the disk space, used by the database, because all the debugging data is stored there. It is highly recommended to turn the Debug mode off when done debugging.
sample uplink message
Let’s review sample uplink message from ChirpStack:
{
    "applicationID": "1",
    "applicationName": "TA692FC-L-5-Application",
    "deviceName": "Sales-Office",
    "devEUI": "ABK9//4CrQQ=",
    "rxInfo": [{
        "gatewayID": "AIAAAAACDgs=",
        "time": null,
        "timeSinceGPSEpoch": null,
        "rssi": -52,
        "loRaSNR": 8.5,
        "channel": 2,
        "rfChain": 0,
        "board": 0,
        "antenna": 0,
        "location": {
            "latitude": 22.31025463915414,
            "longitude": -245.77515719803597,
            "altitude": 0,
            "source": "UNKNOWN",
            "accuracy": 0
        },
        "fineTimestampType": "NONE",
        "context": "LZVORA==",
        "uplinkID": "p7k/E6nyQpeMTwedtMqHgA==",
        "crcStatus": "CRC_OK"
    }],
    "txInfo": {
        "frequency": 868500000,
        "modulation": "LORA",
        "loRaModulationInfo": {
            "bandwidth": 125,
            "spreadingFactor": 12,
            "codeRate": "4/5",
            "polarizationInversion": false
        }
    },
    "adr": true,
    "dr": 0,
    "fCnt": 114,
    "fPort": 10,
    "data": "AOAA12QCAwIBKAAeAw==",
    "tags": {},
    "confirmedUplink": false,
    "devAddr": "ABCDuw==",
    "publishedAt": "2023-06-15T08:24:14.436509221Z",
    "deviceProfileID": "e87f230b-51a7-407a-aa6c-468308601139",
    "deviceProfileName": "TA692FC-L-5-868 Thermostat"
}
Device fields
As you can see the device EUI arrives in the devEUI field. We will use it as a device name in ThingsBoard.
As you can see the device profile name arrives in the deviceProfileName field. We will use it as a device Type (device profile name) in ThingsBoard.
As you can see the device name arrives in the deviceName field. We will use it as a device label in ThingsBoard.
No. |
ChirpStack field |
Editable |
ThingsBoard field |
Editable |
|
1 |
devEUI |
No |
deviceName |
No |
|
2 |
deviceProfileName |
No |
deviceType (deviceProfileName) |
Yes [1] |
|
3 |
deviceName |
Yes [2] |
deviceLabel |
Yes [2] |
Notes
In the converter it will be indicated like this:
var deviceLabel = data.deviceName; // "Sales-Office"
var deviceName =  base64ToHexWithoutUppercase(data.devEUI); //'0012bdfffe02ad04', unique
var deviceType = data.deviceProfileName; //"TA692FC-L-5-868 Thermostat"

var result = {
  deviceName: deviceName,
  deviceType: deviceType,
  deviceLabel: deviceLabel
}
Device data
Device data is encoded in the “data” field. The Base64 encoded data here is:
"data": "AOAA12QCAwIBKAAeAw=="
Let’s convert them into roomTemperature, setTemperature, fanMode and fanState, etc.
In the decoded form we have the following string: 00 E0 00 D7 64 02 03 02 01 28 00 1E 03
00 E0 is the value for roomTemperature, 22.4.
00 D7 is the value for setTemperature, 21.5.
64 is the value for coolProportionalOutput, 100%.
02 is the value for fanMode, MED.
03 is the value for fanState, HIGH.
02 is the value for threshold, 0.2.
01 is the value for systemMode, COOL.
28 is the value for coolPBand, 4.0.
00 1E is the value for coolITime, 30.
03 is the value for kFactor, 3.
In the converter it will be indicated like this:
var result = {
  attributes: {
    setTemperature: parseInt(incomingHexData.substring(4, 8), 16)/10,
    coolProportionalOutput: parseInt(incomingHexData.substring(8, 10), 16)/100,
    fanMode: fanModeStateMeta[parseInt(incomingHexData.substring(10, 12), 16)],
    fanState: fanModeStateMeta[parseInt(incomingHexData.substring(12, 14), 16)],
    threshold: parseInt(incomingHexData.substring(14, 16), 16)/10,
    systemMode: systemModeMeta[parseInt(incomingHexData.substring(16, 18), 16)],
    coolPBand: parseInt(incomingHexData.substring(18, 20), 16)/10,
    coolITime: parseInt(incomingHexData.substring(20, 24), 16),
    kFactor: parseInt(incomingHexData.substring(24, 26), 16)
  },
  telemetry: {
    roomTemperature: parseInt(incomingHexData.substring(0, 4), 16)/10
  }
}
Importing uplink Converter
Data converters –> + –> Import converter.

Popup dialog: Import converter –> Drag and drop the converter file –> Import.

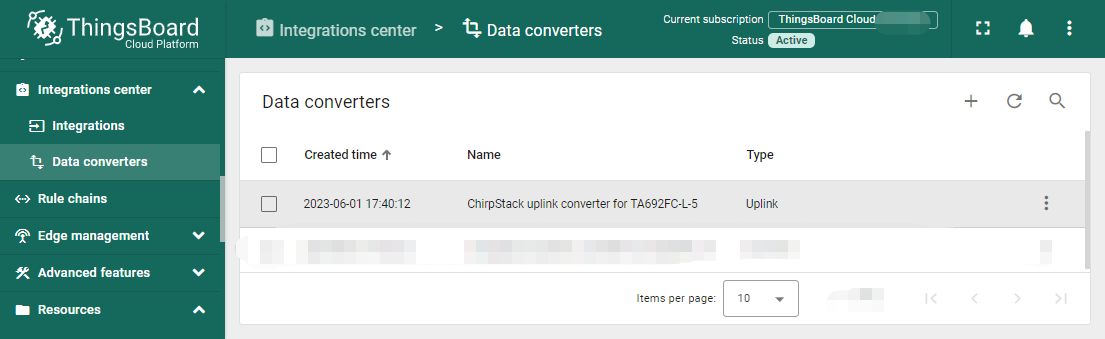
Show it in the list of Data Converters.
You can change the decoder/encoder function while creating the converter or after creating it. If the converter has already been created, then click on the “pencil” icon to edit it. Copy the configuration example for the converter (or your own configuration) and insert it into the decoder/encoder function. Save changes by clicking on the “checkmark” icon.
Step 3.2 Downlink Converter
You can customize the downlink according to your configuration. Let’s consider an example where we send an shared attribute update message - remoteSetSetTemperature.
data: msg.remoteSetSetTemperature
Also, indicate the required parameters in the metadata:
metadata: {
  "cs_devEUI": "$Device_EUI"
}
Example for downlink converter:
var remoteSetSetTemperature = msg.remoteSetSetTemperature;
var fPort = 91;
var content = Math.round(remoteSetSetTemperature * 10);
var contentBase64 = Uint16ToBase64(content);

// Result object with encoded downlink payload
var result = {
    // downlink data content type: JSON, TEXT or BINARY (base64 format)
    contentType: "TEXT",

    // downlink data
    data: contentBase64,//JSON.stringify(data),

    // object: {...},   //ChirpStack v4 // decoded object (when application coded has been configured)
    // Optional metadata object presented in key/value format
    metadata: {
            DevEUI: metadata.cs_devEUI, //ChirpStack v3
            fPort: fPort                //ChirpStack v3
    }
};

function Uint16ToBase64(value) {
    let myArr = new Uint8Array(2);
    myArr[0] = value >> 8; // High byte
    myArr[1] = value >> 0; // Low byte

    let myStr = Uint8ArrayToString(myArr);
    return btoa(myStr);
}

function Uint8ArrayToString(fileData){
  var dataString = "";
  for (var i = 0; i < fileData.length; i++) {
    dataString += String.fromCharCode(fileData[i]);
  }

  return dataString;
}

return result;
Where cs_devEUI is device EUI, it will be taken from the device uplink message.
Importing downlink Converter
Data converters –> + –> Import converter.

Popup dialog: Import converter –> Drag and drop the converter file –> Import.

Show it in the list of Data Converters.

Step 3.3 Create Integration
Step 3.3.1 Get Application API key from ChirpStack
To get the API key we need to open Application server UI, open API keys tab from the left top menu and Create an API key.

Input your API key name –> Create API key.

Copy your token.

Show it in the list of global API keys.

Step 3.3.2 Adding ChirpStack intergration on ThingsBoard
Now that the Uplink converter and Downlink converter have been created, and we have all required data, it is possible to create an integration.
Integrations –> select a integration type: ChirpStack –> input name: TA692FC-L-5 ChirpStack integration –> enable integration, debug mode and allow create devices or assets –> Next.

Select Uplink data convert: TA692FC-L-5 downlink from ChirpStack.

Select Downlink data convert: TA692FC-L-5 uplink from ChirpStack.

Check Base URL –> copy HTTP endpoint URL –> paste your ChirpStack Application server URL –> paste your ChirpStack Application server API Token.

Show it in the list of integrations.

NOTE: It is recommended to enable Debug mode for debug purposes to see uplink/downlink events on integration.
Step 3.3.3 Configure an Integration for your ChirpStack application
To create integration on ChirpStack Network server stack, we need to do the following steps:
Login to ChirpStack Network server stack user interface (Default login/password - admin/admin).
We go to the tab Applications in the left menu and open our application (our application is named Application).

Open the Integrations tab and create a HTTP integration.

Let`s go to the Integrations tab in ThingsBoard. Find your ChirpStack integration and click on it. There you can find the HTTP endpoint URL. Click on the icon to copy the url.
Fill the fields with endpoint url from ThingsBoard integration:

Step 3.3.4 Importing rule chain for Downlink
In order to send Downlink, we use the rule chain to process shared attribute update. To get devEUI from device we have to import rule-chain.
Rule chains –> + –> Import rule chain –> Popup dialog: Import rule chain –> Drag and drop the Rule chain file –> Import.

Show it in the list of Rule chains –> Click on the row.

Show the rule chain details.

Check the node of get required fields.

Check the node of Send downlink.

Step 3.3.5 Configure the root rule-chain
Rule chains –> Click on the row.

Drag and drop the Rule Chain node –> Popup dialog: Add rule node: rule chain –> Input your node name, eg: Downlin to ChirpStack –> Select the Rule Chain, eg: TA695FC-L-5 downlink to ChirpStack –> Add.

Now, root rule chain looks like this:

Add link from Message Type Switch to Downlink to ChirpStack –> Popup dialog: Select a link label: Attributes updated –> Add.

Save the root rule chain.

Step 3.4 Processing Uplink message
When device sends uplink message, you will receive an uplink event on integration and data from the device.

The created device with data can be seen in the section Device groups –> All.

Received data can be viewed in the Uplink converter. In the “In” and “Out” blocks of the Events tab:


Step 3.5 Processing Downlink message
We go to the Device group section in the All folder, to see this with an example. We add a remoteSetSetTemperature of the device in the Shared attributes (initialize the remoteSetSetTemperature to 25.5).


Now, We have indicated the remoteSetSetTemperature of the device in the Shared attributes. Now we edit it by clicking on the “pencil” icon.

Then we make changes to the attribute (change the remoteSetSetTemperature to 19.5) and save the data.

Received data and data that was sent can be viewed in the downlink converter. In the In block of the Events tab, we see what data entered and the Out field displays messages to device:


Step 3.6 Visiual Data
Use the Dashboards to work with data. Dashboards are a modern format for collecting and visualizing data sets. Visibility of data presentation is achieved through a variety of widgets.
For more information about the dashboard, please refer to here.