Add TA652FH-W to ThingsBoard
Tip
This section applies to the situation where you add TA652FH-W to ThingsBoard Server.
If you are adding the first Avantec HVAC device to ThingsBoard Server, please refer to Get Started.
Step 1. Tenant Login
Open ThingsBoard Web UI in browser, e.g. http://localhost:8080
Tenant Administrator login ThingsBoard.
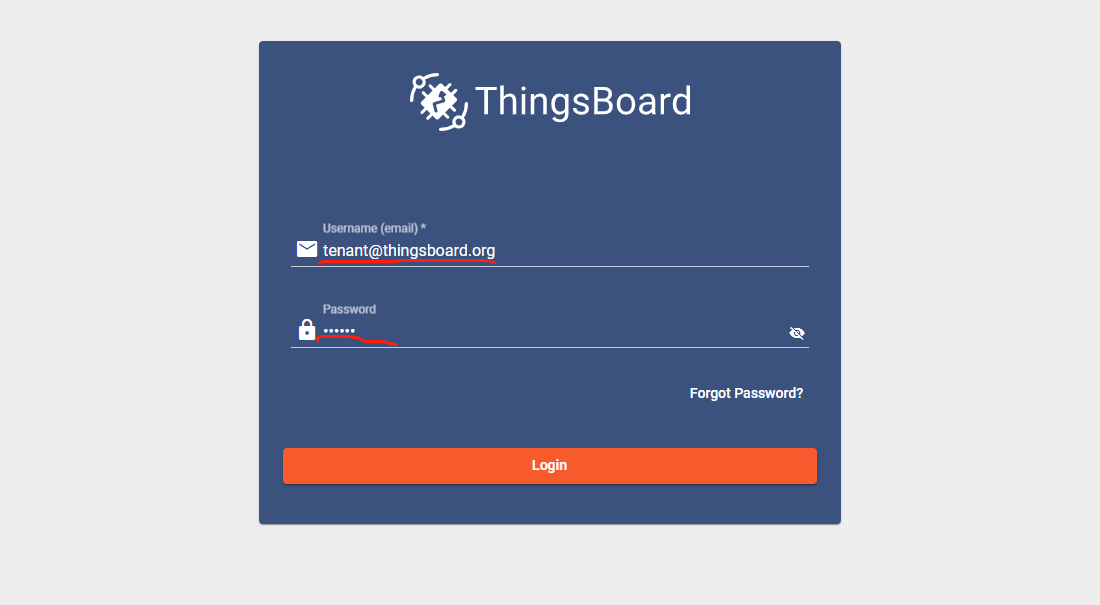
Tenant default username and password, refer to Some important parameters.
Step 2. Import Detail Dashboard of TA652FH-W
Step 3. Import List Dashboard of TA652FH-W
Step 4. Provision TA652FH-W device
Step 4.1 Add device
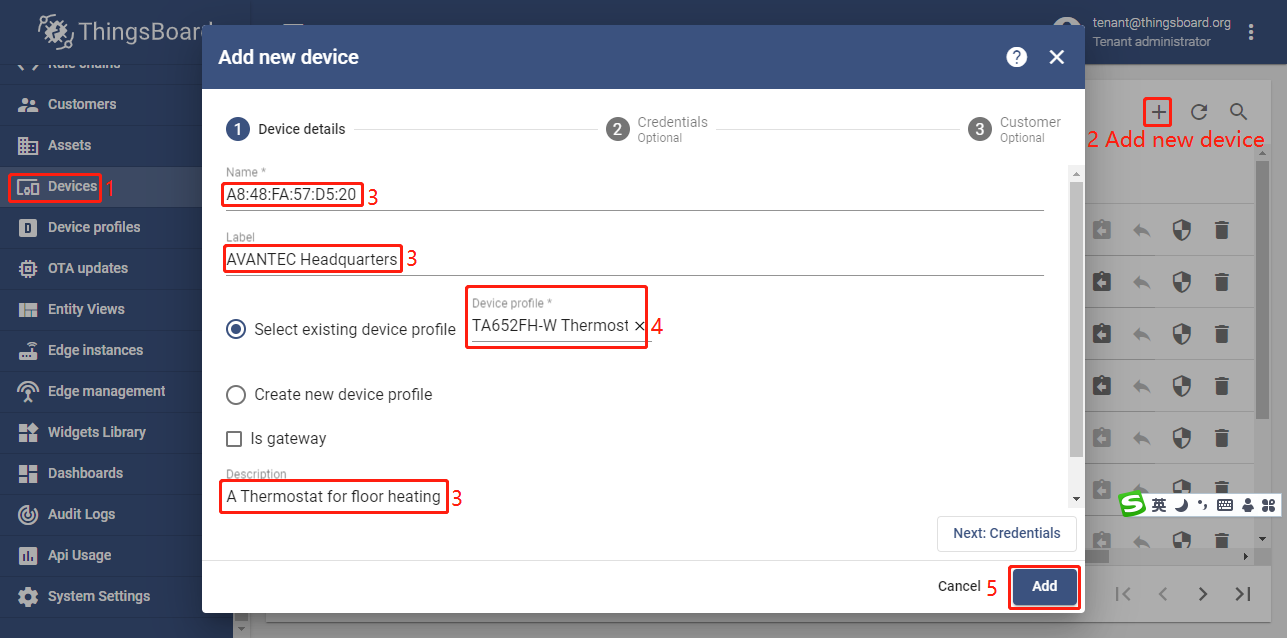
Devices –> + –> Add new device –> Popup Dialog –> Input Name, Label & Description, select device profile –> Add.
Field |
Value |
|---|---|
Name* |
My device name, e.g. TA652FH-W-TB, A8:48:FA:57:D5:20 |
Device profile* |
TA652FH-W Thermostat |
Label |
My device label, e.g. Avantec Manufacturing Plant |
Description |
My device description, e.g. A Thermostat for floor-heating |
Note
The field with * must be filled in.
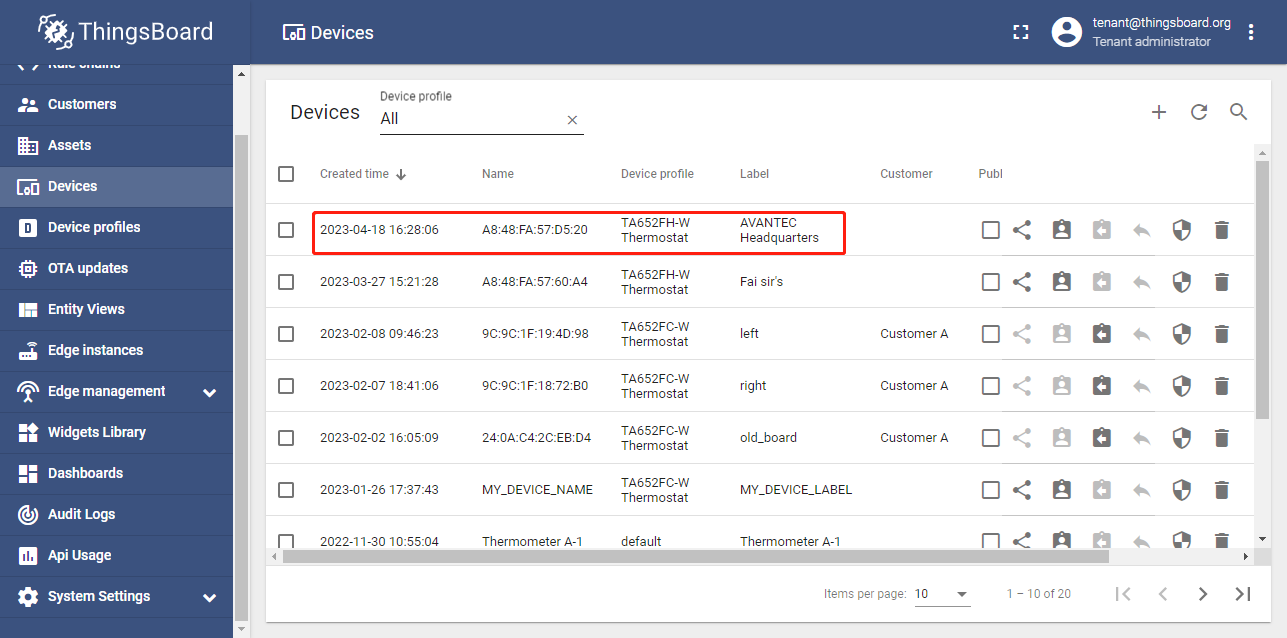
Now my device should be listed first, since the table sort devices using the time of the creation by default.
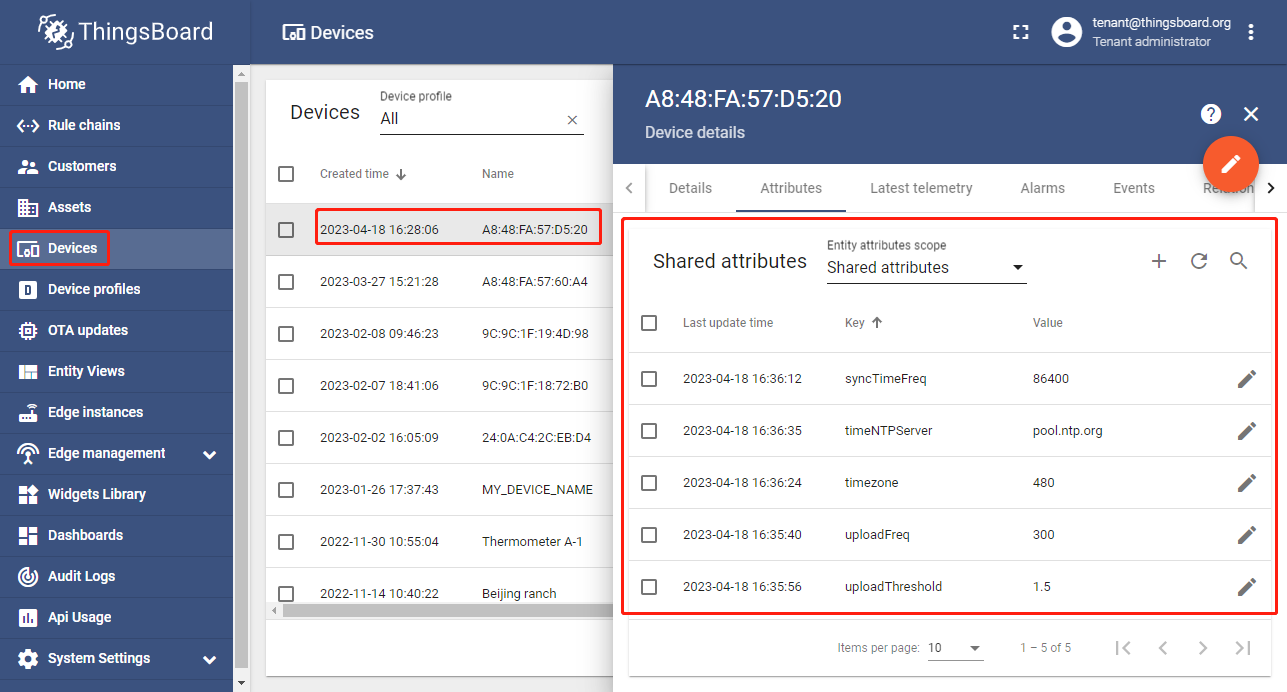
Step 4.2 Add shared attributes of new device
Devices –> Click my device –> Attributes –> Shared attributes –> + –> Popup Dialog –> Input Key, Value type & value –> Add。
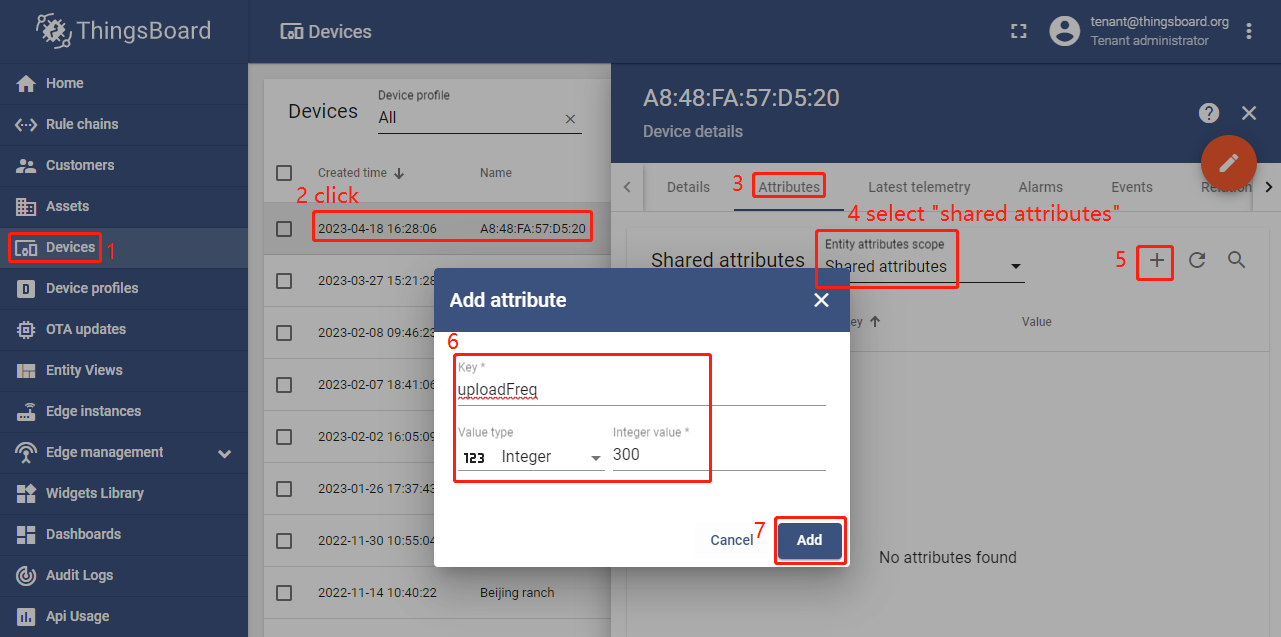
Please add the following Shared attributes of TA652FH-W:
Key* |
Value Type* |
Value* |
Memo |
|---|---|---|---|
Integer |
300 |
5*60. Telemetry per uploadFreq seconds |
|
Double |
1.5 |
1.5°C. If the temprature (Telemetry data) |
|
Integer |
86400 |
24*3600. Sync time per syncTimeFreq seconds |
|
Integer |
480 |
Please replace with your value. |
|
String |
pool.ntp.org |
SNTP Server URL, e.g. pool.ntp.org, |
Note
The field with * must be filled in.
Now the shared attributes of my device is like:
- You may also use:
Bulk provisioning to provision multiple devices from a CSV file using UI.
Device provisioning to allow device firmware to automatically provision the device, so you don’t need to configure each device manually.
REST API to provision devices and other entities programmatically.
Step 5. Connect TA652FH-W device
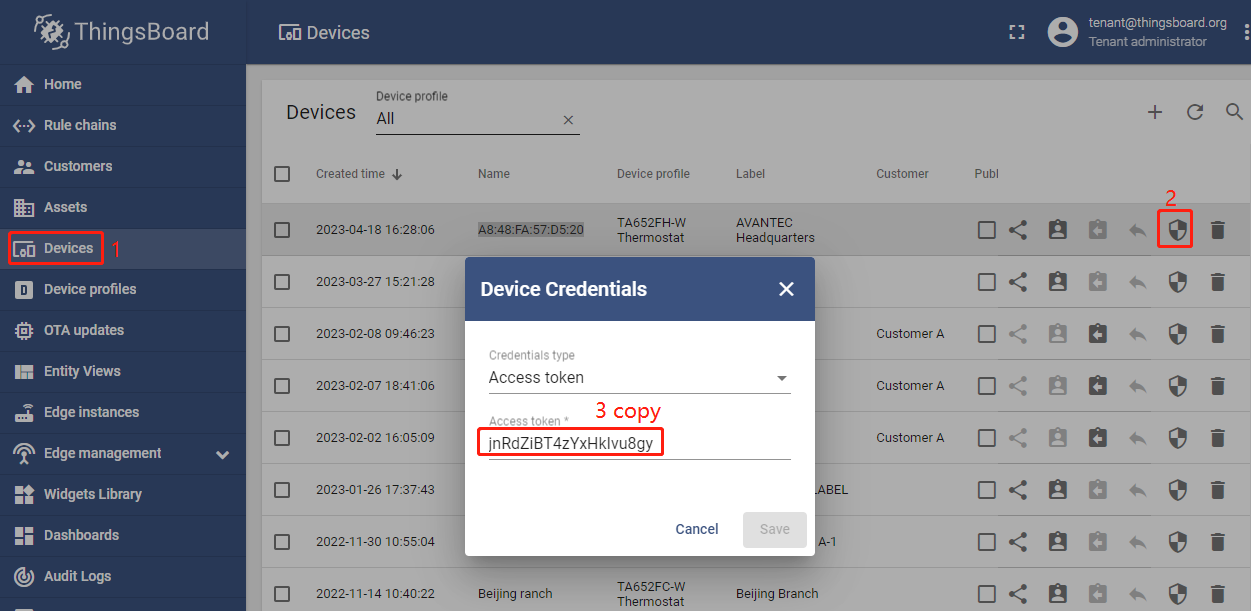
Step 5.1 Copy credentials of new device
To connect the device you need to get the device credentials first. ThingsBoard supports various device credentials. We recommend using default auto-generated credentials which is access token for this guide.
Devices –> Manage credentials (icon) –> Popup Dialog –> Select Access Token,
Ctrl + C.
Tip
The Credentials (Access Token), which you need to use when you’re configuring your hardware, for example, j9JiCkID9E7uE1WhKxnc, lMTQLZ7VSRQSD7ls.
Step 5.2 Connect device to ThingsBoard
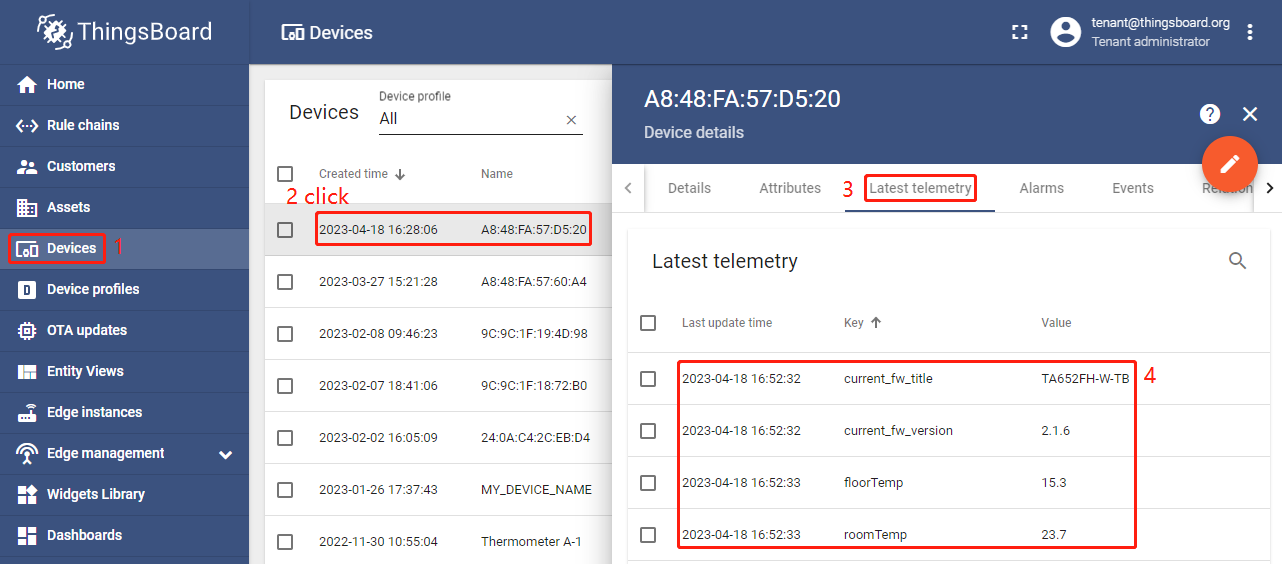
Step 5.3 Publish data to ThingsBoard
Now your device has already published telemetry data to ThingsBoard. You should immediately see them in the Device Telemetry Tab:
Step 6. Assign Device and Dashboards to Customer
One of the most important ThingsBoard features is the ability to assign Dashboards to Customers. You may assign different devices to different customers. Then, you may create a Dashboard(s) and assign it to multiple customers. Each customer user will see his own devices and will not be able to see devices or any other data that belongs to a different customer.
Refer to Step 7.1 Create customers, Step 7.4 Create customer user & Step 7.5 Activate customer user.
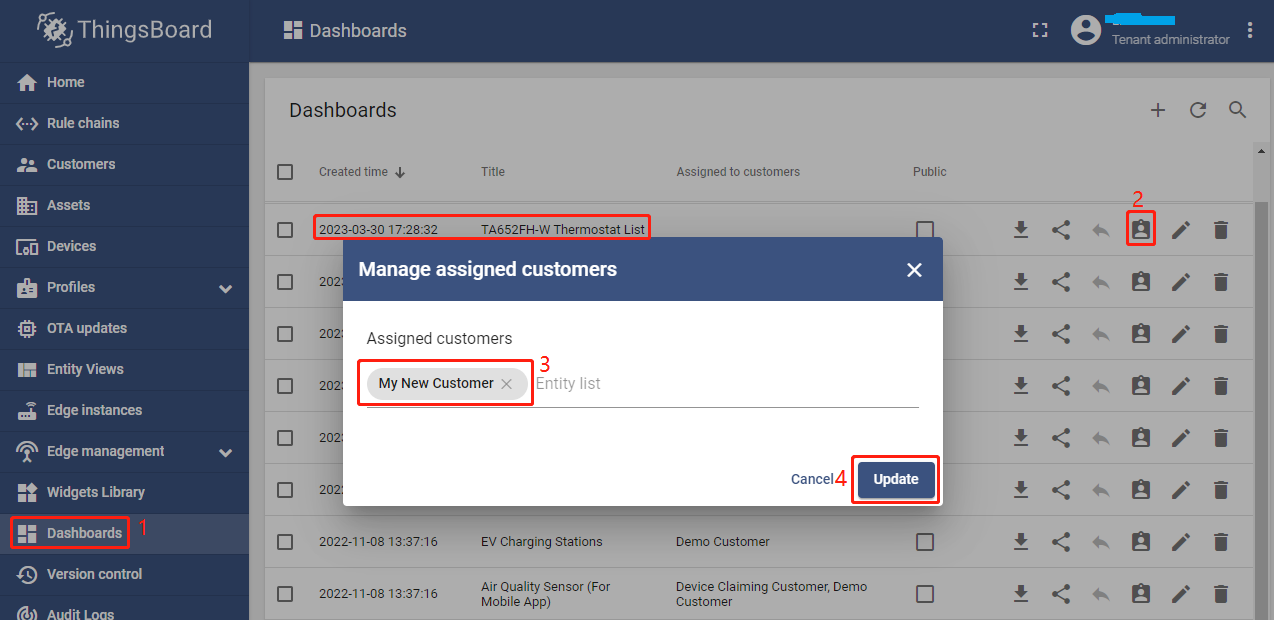
Step 6.1 Assign dashboards of TA652FH-W to Customer
Assign Detail dashboard to Customer: Dashboards –> Click Manage assigned customers (icon) in Detail dashboard line –> Popup Dialog –> Select My New Customer –> Update.
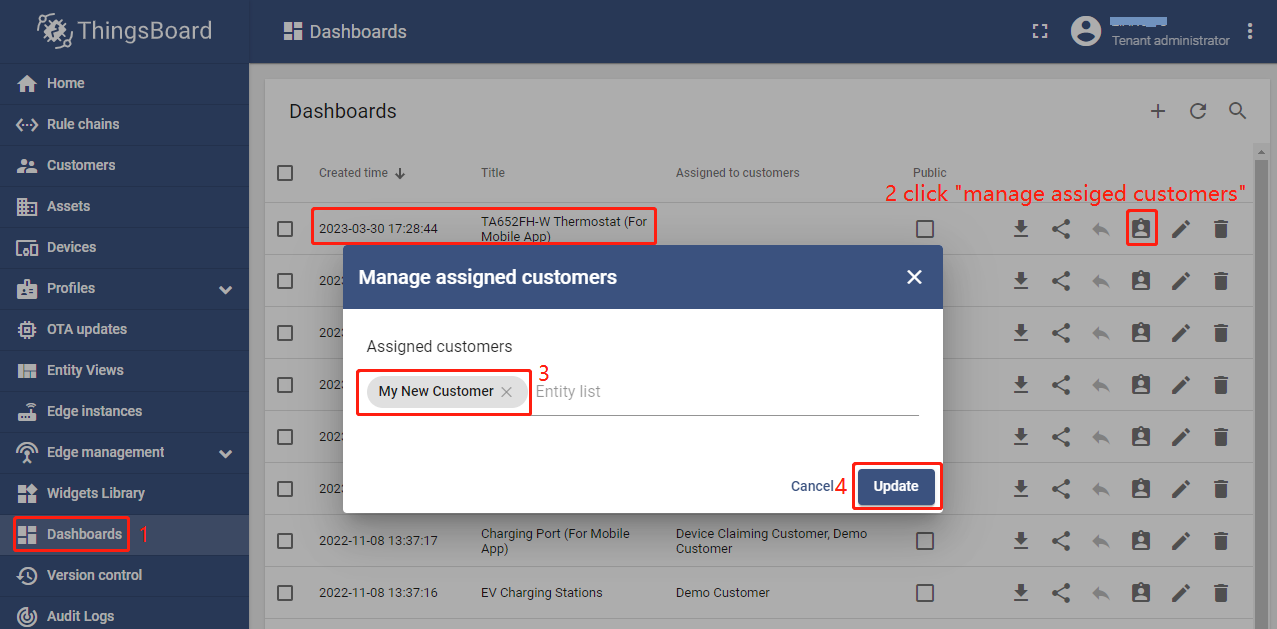
Assign List dashboard to Customer: Dashboards –> Click Manage assigned customers (icon) in List dashboard line –> Popup Dialog –> Select My New Customer –> Update.
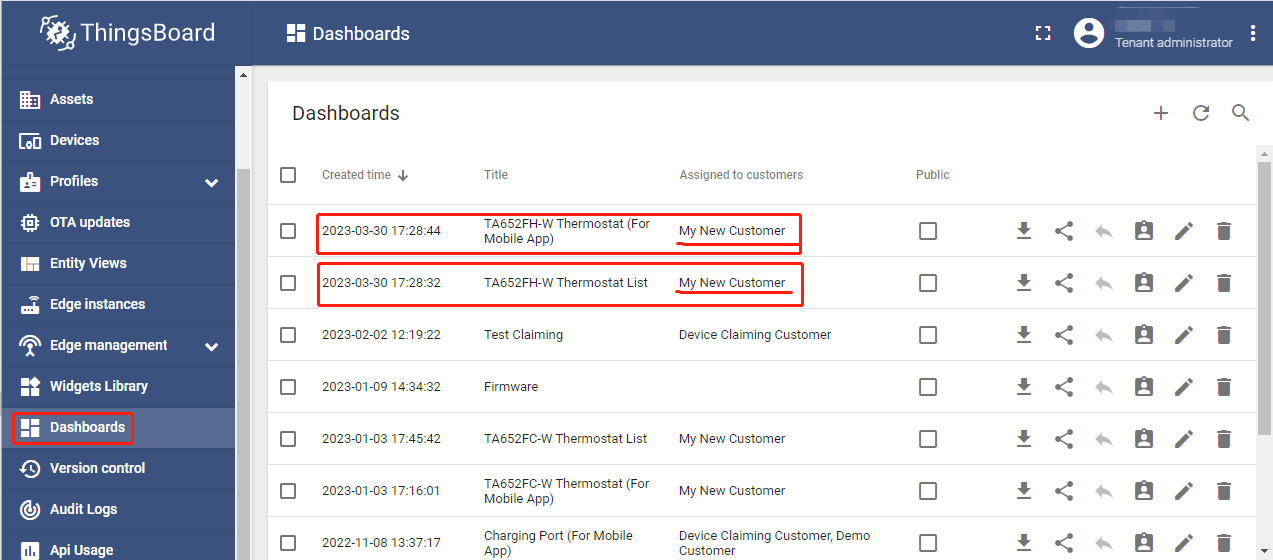
It’s like this now.
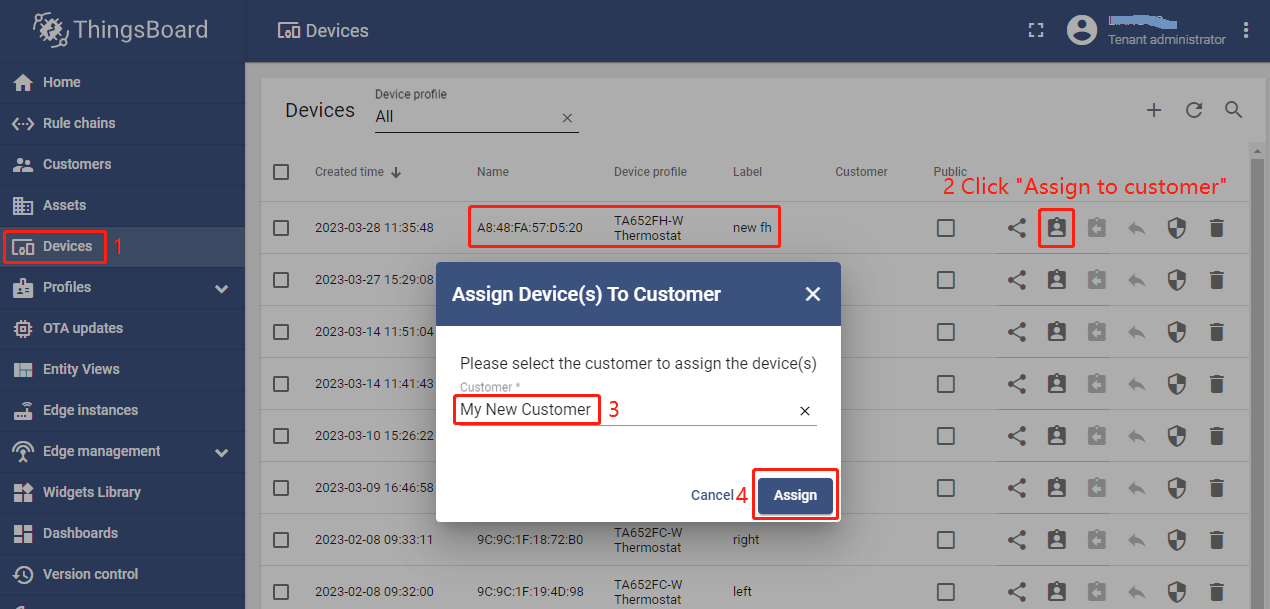
Step 6.2 Assign TA652FH-W device to Customer
Devices –> Click Assign to customers (icon) in My New Device line –> Popup Dialog –> Select My New Customer –> Assign.
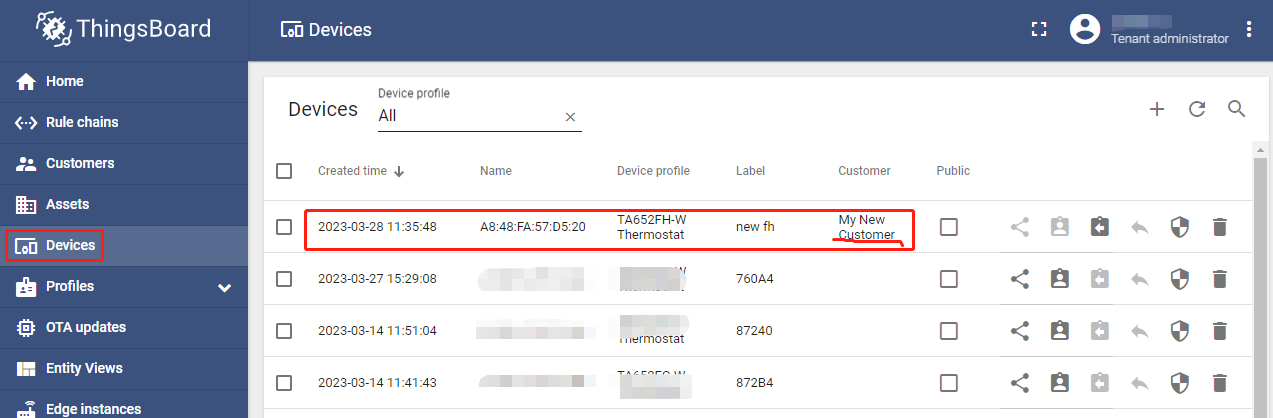
It’s like this now.
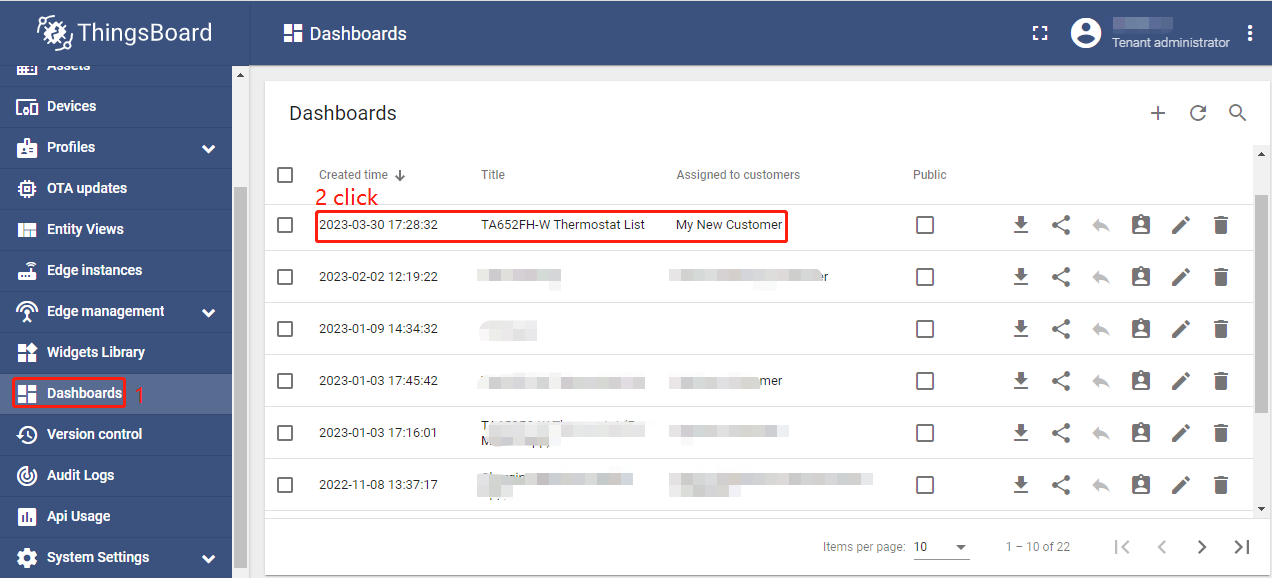
Step 7. Open Dashboards of TA652FH-W
You are logged in as a Customer User or a Tenant user.
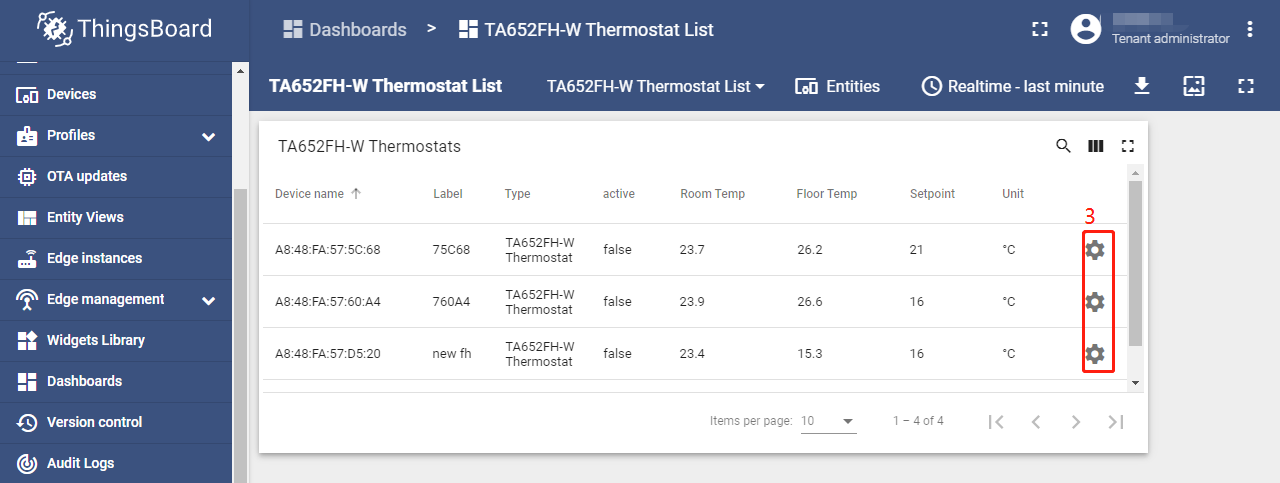
Dashboards –> click my list dashboard
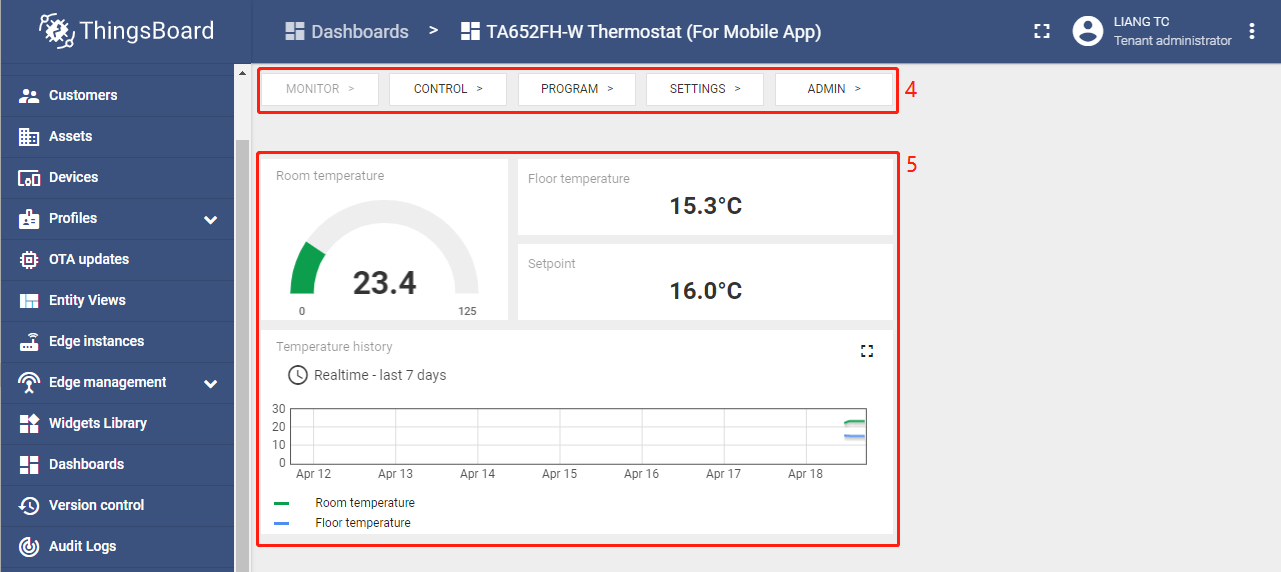
Select my device –> Settings (icon)
Switch page –> Operation
Your feedback
Don’t hesitate to star Avantec on github to help us spread the word.