MultiTech Conduit® MTCAP-868-041A
MTCAP Series
Refer to MultiTech Conduit® AP Access Point for LoRa® Technology (MTCAP Series).
The MultiTech Conduit® AP conveniently provides deep in-building connectivity and improved performance for network operators and enterprises connecting thousands of IoT assets by harnessing the power of the LoRaWAN® protocol.
Easy to deploy, the Conduit AP access point extends LoRa® connectivity in commercial buildings like hotels, convention centers, offices and retail facilities providing coverage in difficult to reach areas cell tower or rooftop deployments may not penetrate.
MTCAP-868-041A
Refer to:
Ethernet Only mPower Programmable Access Point with external LoRa antenna and EU/UK Accessory Kit.
Accessory kit includes power supply and blade(s), LoRa antenna, Ethernet cable, mounting bracket and Quick Start Guide.
First-Time Setup of Gateway
Note
This configuration works with the LoRa packet forwarder. You may choose to use Ethernet with LoRa or Cellular with LoRa (if your model has a cellular radio).
This setup wizard helps you configure the main features of your device for initial setup. In most cases, you can accept the provided defaults. See First-Time Setup in the software guide for more details.
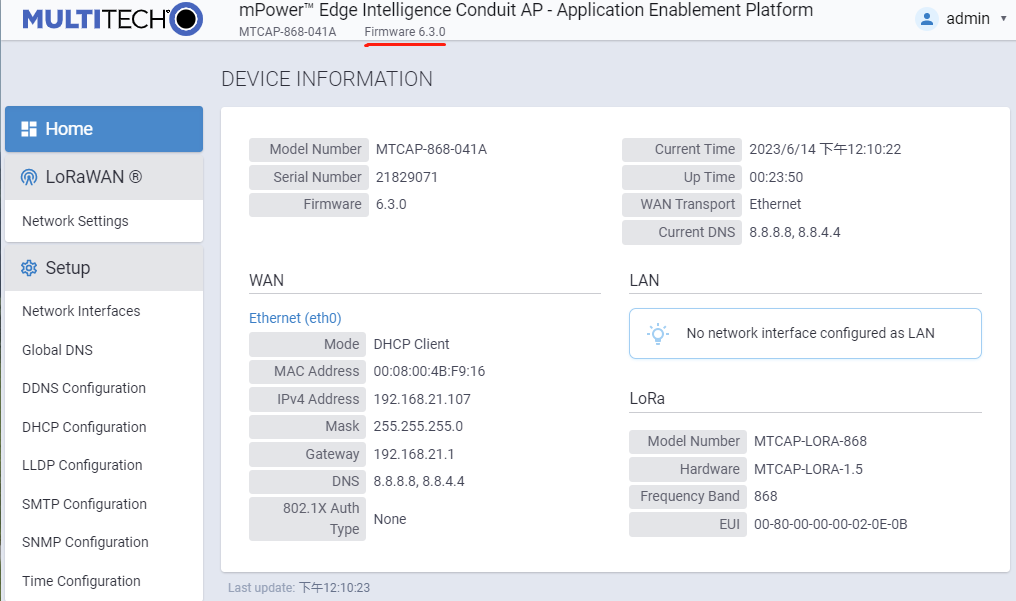
Go to your browser’s address line and enter the default IP address for the gateway to access the UI: 192.168.2.1. Most browsers display a warning about HTTP addresses being unsafe. Click on Advanced and continue to 192.168.2.1.

Upon power up for the first time, the device will be in commissioning mode. The system requires you to set up an administrative user. Enter your desired username and click OK.
Enter a desired password for the administrative user and click OK. This password must be of sufficient length and strength (with a mix of character classes such as letters, numbers, and symbols). Enter the password again to confirm. Click OK.
The login page appears. Enter username and password.
First-Time Setup Wizard appears.
- For Call Home,
Accept all default settings (disabled).
Click Next.
- Set the date, time, and time zone.
If the information is correct, accept the default values.
Otherwise, update Date, Time, and/or Time Zone.
Click Next.
- Configure LAN network interfaces Eth0 and Br0.
Accept all default settings - eth0 assigned to the bridge br0 (with DHCP set automatically). NOTE: You will need to make additional configuration changes for Ethernet under Network Interfaces after First-Time Setup. See Using Ethernet with LoRa Packet Forwarder.
Click Next.

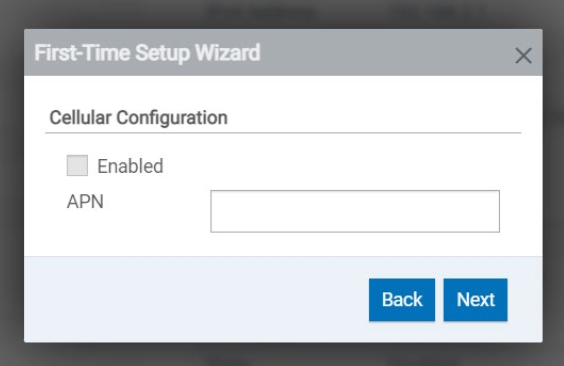
- Configure your device’s Cellular connection.
If you have no cellular radio (Ethernet only) in your device or plan to use Ethernet with the LoRa packet forwarder, accept all defaults with Enabled deactivated (Cellular is disabled) and APN left blank.
If you have a cellular radio model and plan to use Cellular with the LoRa packet forwarder, select Enabled (Cellular is enabled).
If required by your network carrier, enter your APN (Some carrier networks may set it automatically via OTA registration. Leave it blank in that case).
Click Next.
- For Cellular Authentication,
Accept all defaults (NONE).
Click Next.
- For Remote Management,
Accept all defaults (disabled).
Click Next.
- For HTTP/HTTPS Access,
Accept all defaults (enable HTTP to HTTPS via LAN).
Click Next.
- For Bootloader Protection (setting a u-boot password),
Disable Bootloader Protection (defaults vary with firmware version).
Click Finish.
To save your changes, click Save and Apply.
Configuring LoRa Packet Forwarder
Using Ethernet with LoRa Packet Forwarder
If you are planning to use Ethernet with the LoRa Packet Forwarder, then you must make this configuration change below before configuring and running Packet Forwarder. If you are using a Cellular connection with LoRa, you can skip these steps.
Go to Network Interfaces. Click the pencil for the eth0 interface.
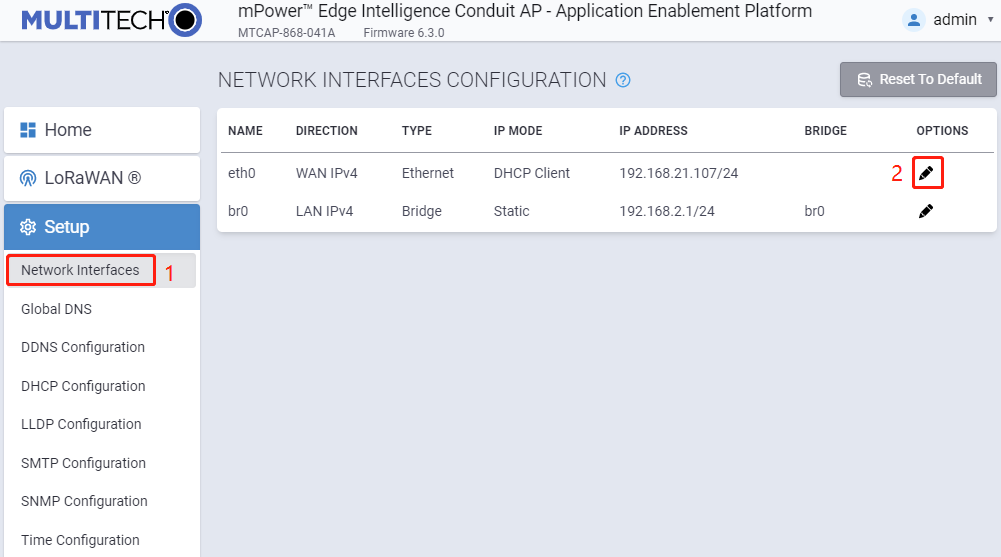
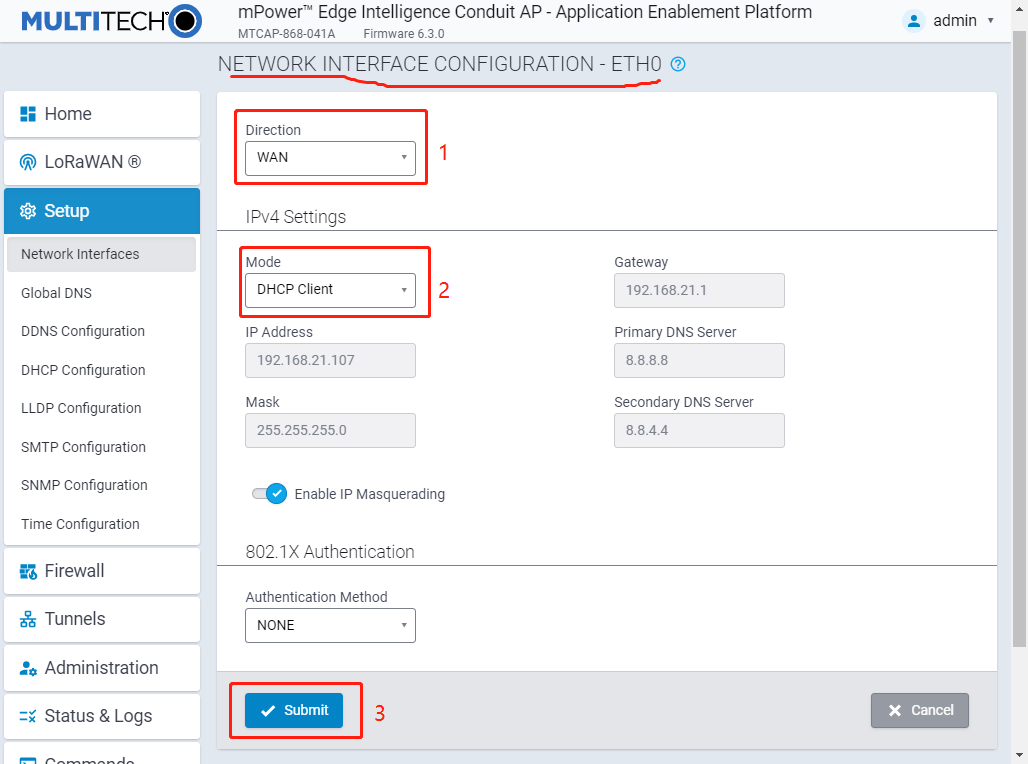
- Under Network Interface ETH0,
change Direction to WAN.
Under Mode, select DHCP Client.
Click Submit.
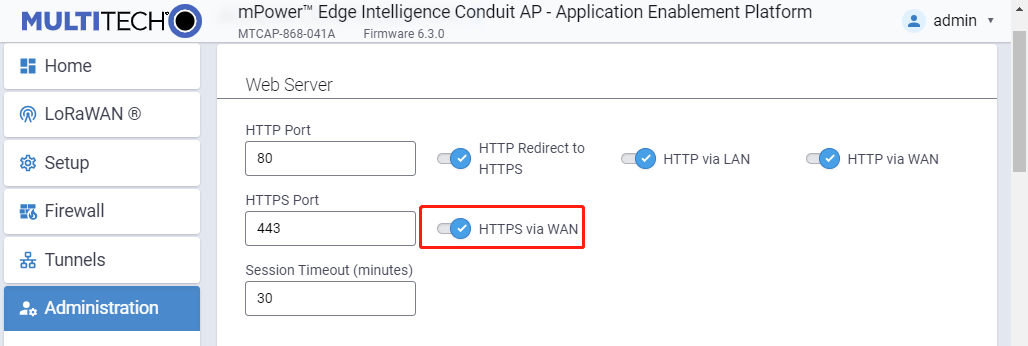
Go to Administration > Access Configuration > HTTPS, Enable HTTPS via WAN, then click Submit.
Click Save and Apply.
Configuring the Gateway
To activate LoRa Packet Forwarder Mode on your device:
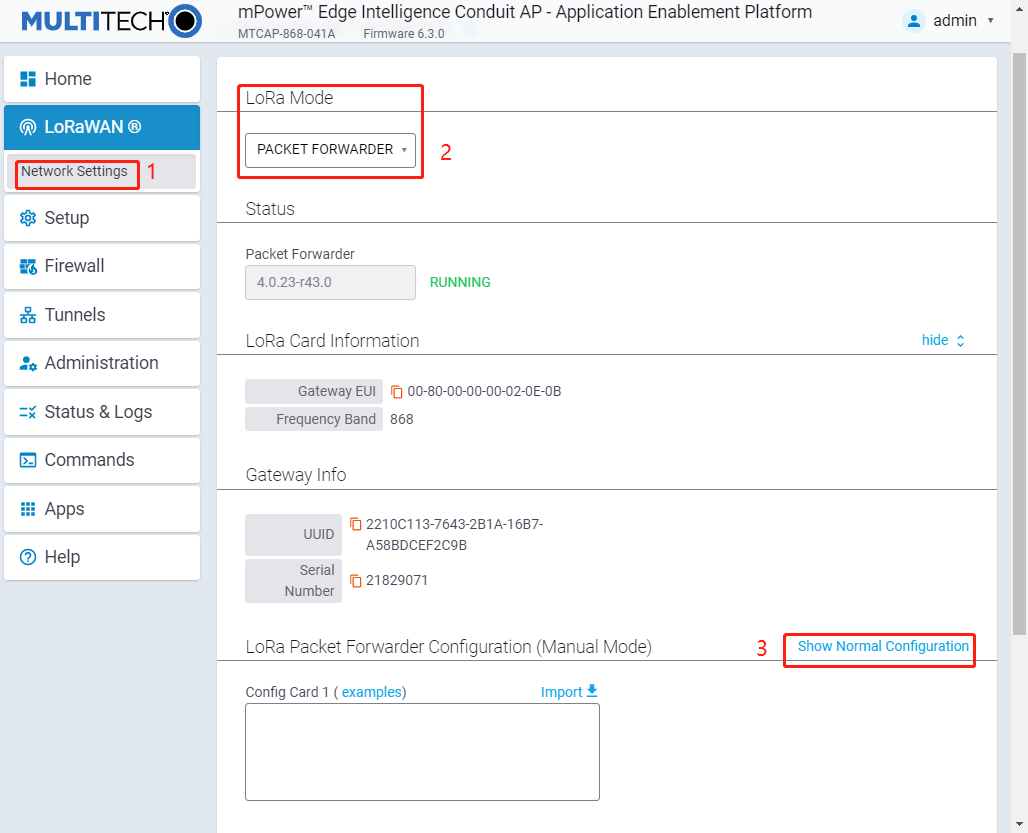
For LoRaWAN > Network Settings > LoRa Mode, select PACKET FORWARDER under Mode. If Manual Configuration is showing, click Normal Configuration to switch.
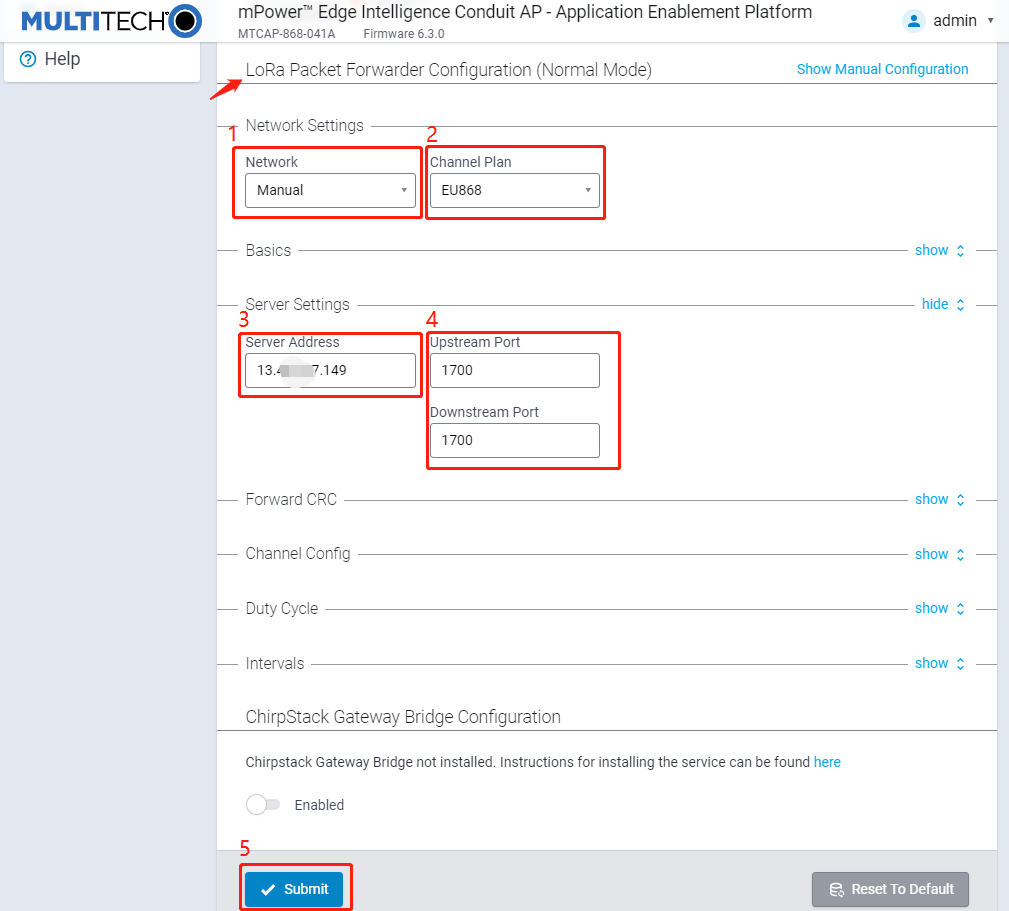
- For LoRaWAN > Network Settings > LoRa Packet Forwarder Configuration,
You should select the network to use from the drop-down under Network: Manual, Radio Bridge ChirpStack, The Things Network, Senet, or Loriot. In this case, select Manual.
Select the appropriate Channel Plan for the Packet Forwarder. Choose from the drop-down menu: US915: 915, AU915: 915, AS923-1: 915, AS923-2: 915, AS923-3: 915, AS923-4: 915, KR920: 915, EU868: 868, IN865: 868, RU864: 868, or ISM2400: 2400. In this case, select EU868.
Type your LoRaWAN Network Server address - your ChirpStack IP.
Type upstream port & downstream port: 1700.
Click Submit.
Then, click Save and Apply.
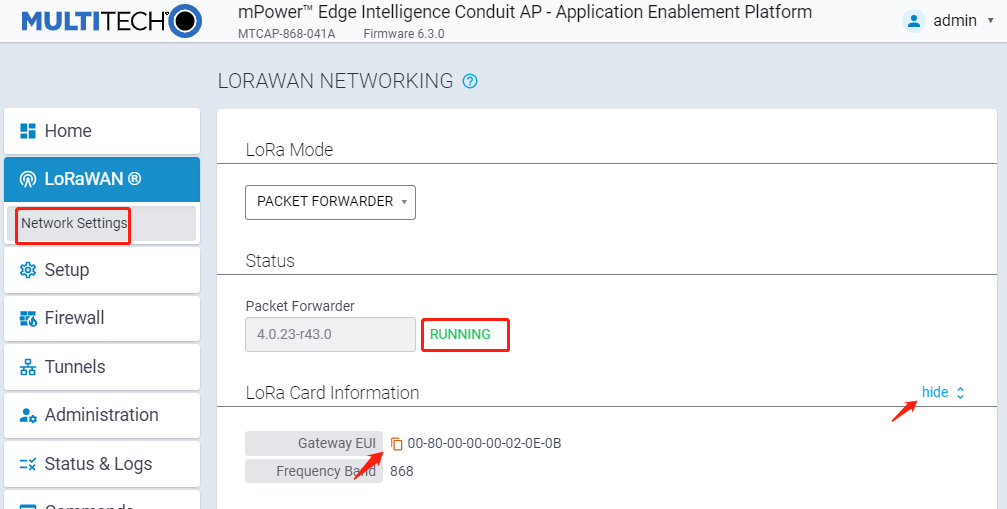
Confirm that the Packet Forwarder is now running under Status. Show the LoRa Card Information and copy the Gateway EUI (save for later).
Make sure to properly add your gateway and any end devices to the network based on their specific system and instructions. For this example, we will configure the gateway and end device using Manual.
Optional: Firmware Upgrade
Tip
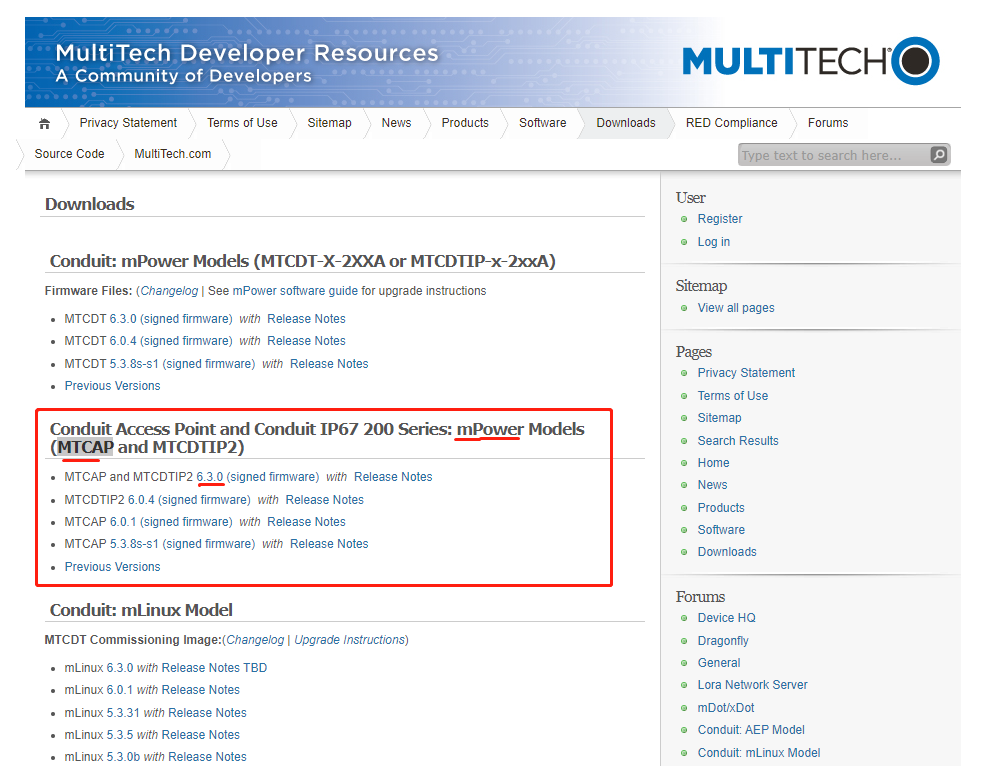
To install mPower 6.3.0, the Conduit gateway must be upgraded to mPower 6.0.0 or higher. Customers that are running earlier versions of mPower should use the following upgrade process.

Download a new firmware form here.
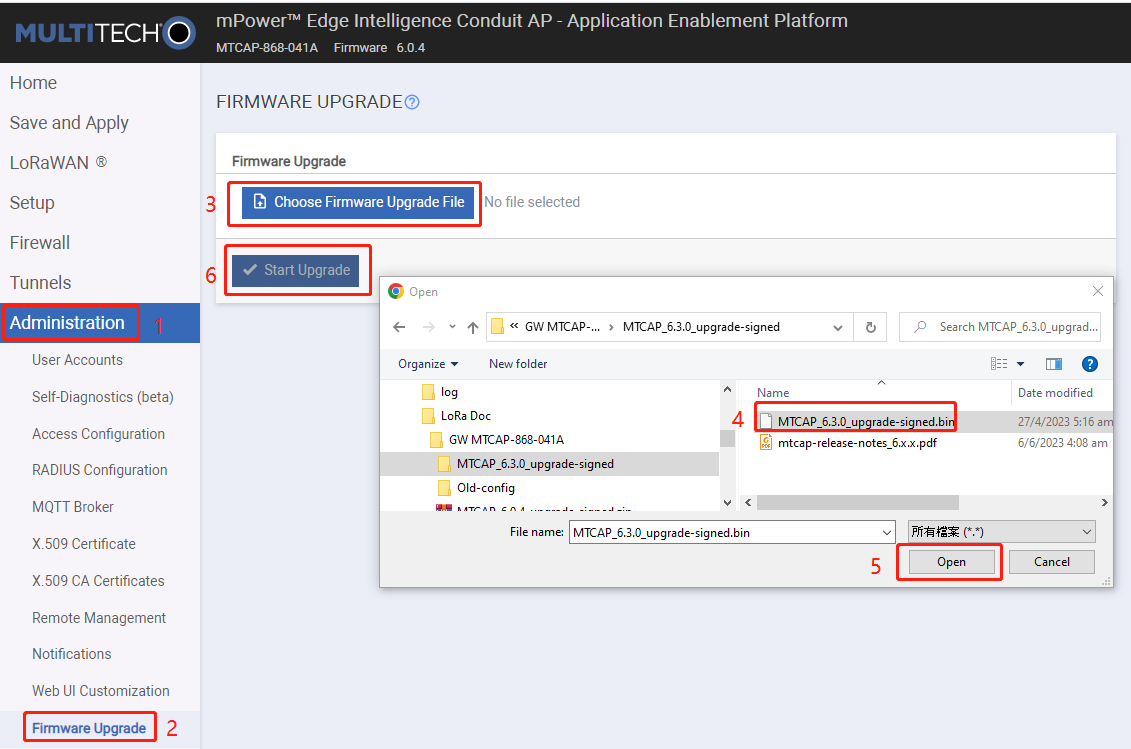
Updrade: For Administartion > Firmware Upgrade > Choose Firmware Upgrade File, select a new firmware > Open > Start Upgrade >
Click OK in a popup dialog.
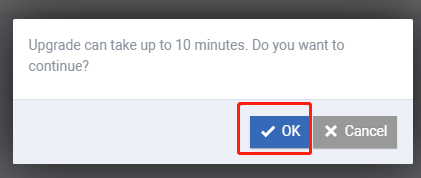
Wait a few minutes. After the firmware upgrade is successful, MTCAP will automatically restart. If the upgrade is successful, you will see the new version number after logging in.