Get Started
Tip
This section applies when no Avantec HVAC device is added to the ThingBoard server.
- If you add some Avantec HVAC devices to ThingsBoard Server again, please refer to the instructions of each device.
Reprinted this article from Getting Started with ThingsBoard, slightly modified.
Introduction
The goal of this tutorial is to demonstrate the basic usage of the most popular Avantec HVAC device and ThingsBoard features. You will learn how to:
Connect devices to ThingsBoard;
Import real-time end-user dashboards.
We will connect and visualize data from a Avantec HVAC device to keep it simple.
Refer to Getting Started with ThingsBoard to get support for the following features:
Define thresholds and trigger alarms;
Push notifications about new alarms over email, SMS or other systems.
Prerequisites
You will need to have ThingsBoard server up and running.
The easiest way is to use Live Demo server.
- The alternative option is to install ThingsBoard using Installation options.
Windows users should follow this guide.
Linux users that have docker installed should execute the following commands:
mkdir -p ~/.mytb-data && sudo chown -R 799:799 ~/.mytb-data
mkdir -p ~/.mytb-logs && sudo chown -R 799:799 ~/.mytb-logs
docker run -it -p 9090:9090 -p 7070:7070 -p 1883:1883 -p 5683-5688:5683-5688/udp -v ~/.mytb-data:/data \
-v ~/.mytb-logs:/var/log/thingsboard --name mytb --restart always thingsboard/tb-postgres
These commands install ThingsBoard and load demo data and accounts. ThingsBoard UI will be available using the URL: http://localhost:8080 . You may use username tenant@thingsboard.org and password tenant. More info about demo accounts is available.
Some important parameters
Please remember the following important parameters, which will be used frequently in the following work:
ThingsBoard |
Web URI |
Default Tenant Account |
MQTT URI / Cloud Host |
|---|---|---|---|
Live Demo |
mqtt://demo.thingsboard.io |
||
ThingsBoard |
mqtt://mqtt.thingsboard.cloud |
||
Installation |
local: |
username: |
mqtt://your_server_ip |
Step 1. Tenant Login
Open ThingsBoard Web UI in browser, e.g. http://localhost:8080
Tenant Administrator login ThingsBoard.
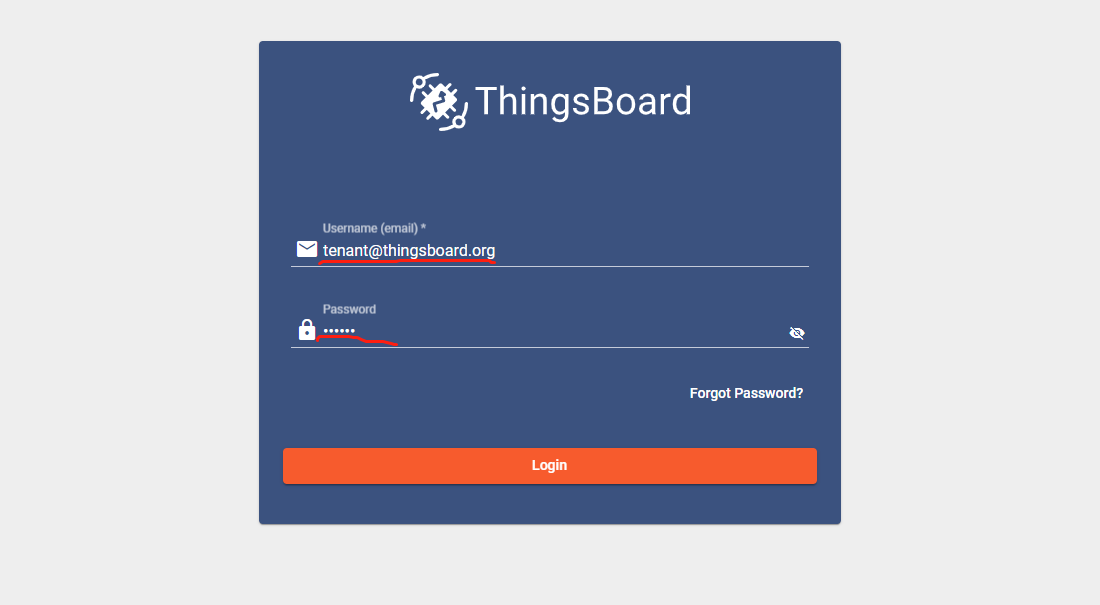
Tenant default username and password, refer to Some important parameters.
Step 2. Import Avantec Widgets
Step 3. Import device profile
Step 4. Import Dashboards
Step 5. Provision device
Step 6. Connect device
Step 7. Assign Device and Dashboards to Customer
One of the most important ThingsBoard features is the ability to assign Dashboards to Customers. You may assign different devices to different customers. Then, you may create a Dashboard(s) and assign it to multiple customers. Each customer user will see his own devices and will not be able to see devices or any other data that belongs to a different customer.
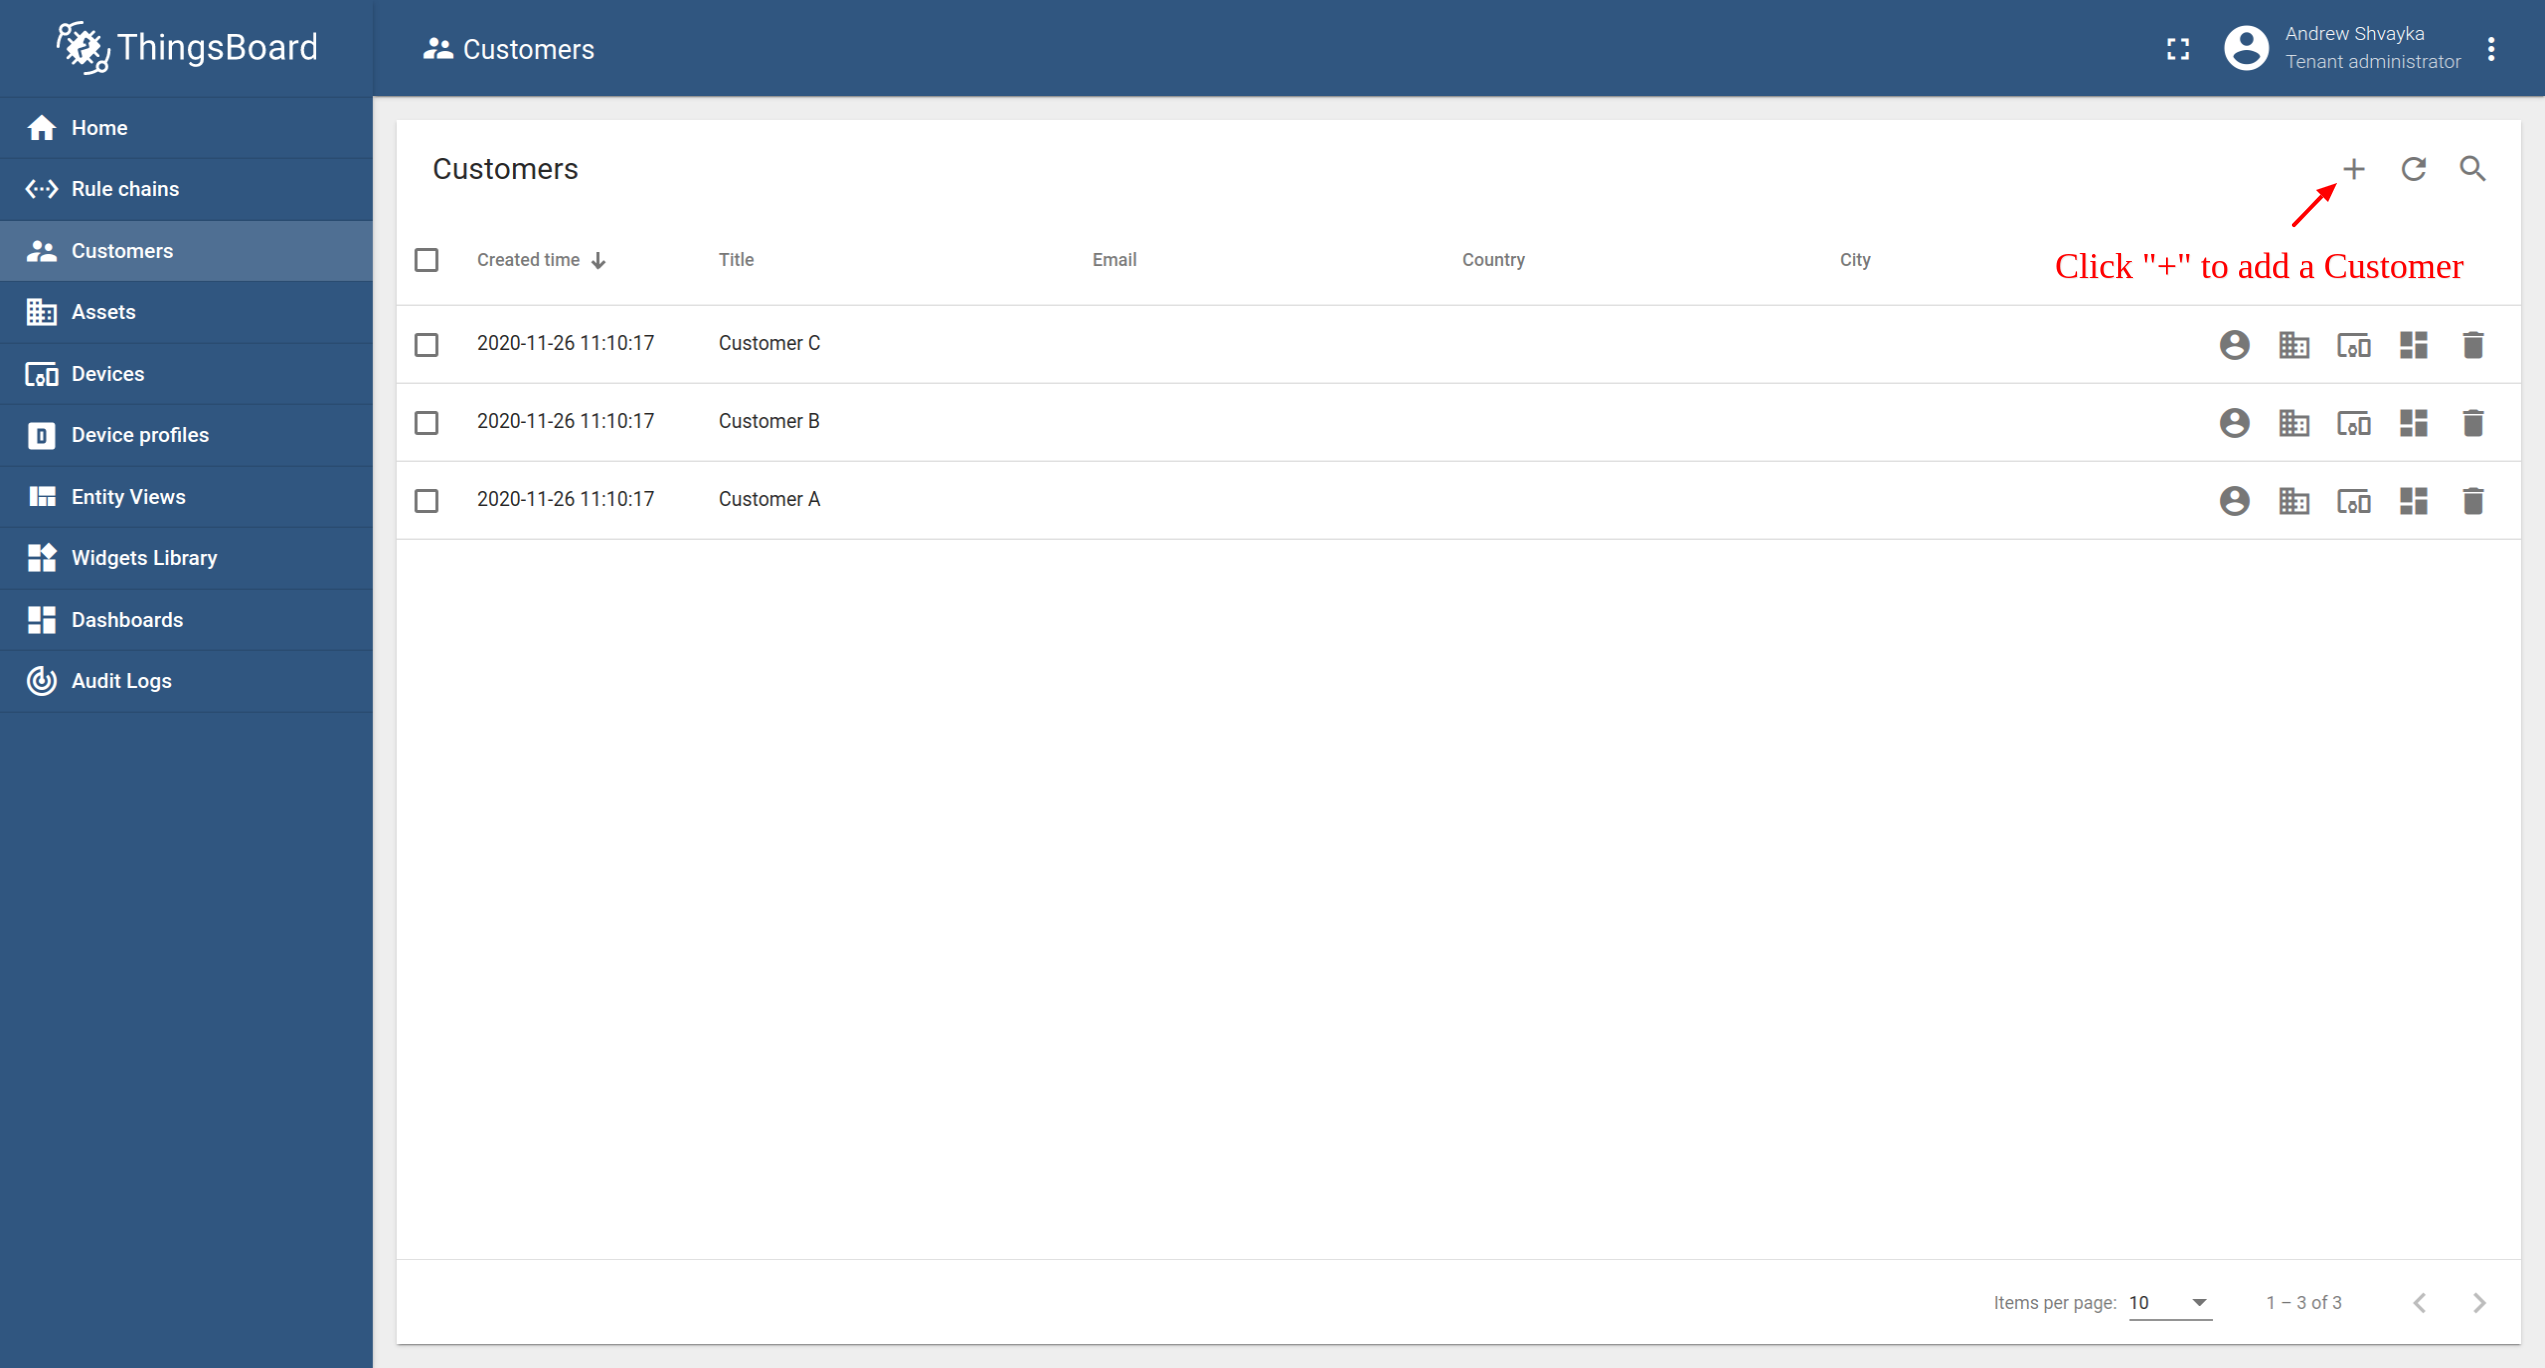
Step 7.1 Create customers
Let’s create a customer with title “My New Customer”. Please see instruction below:
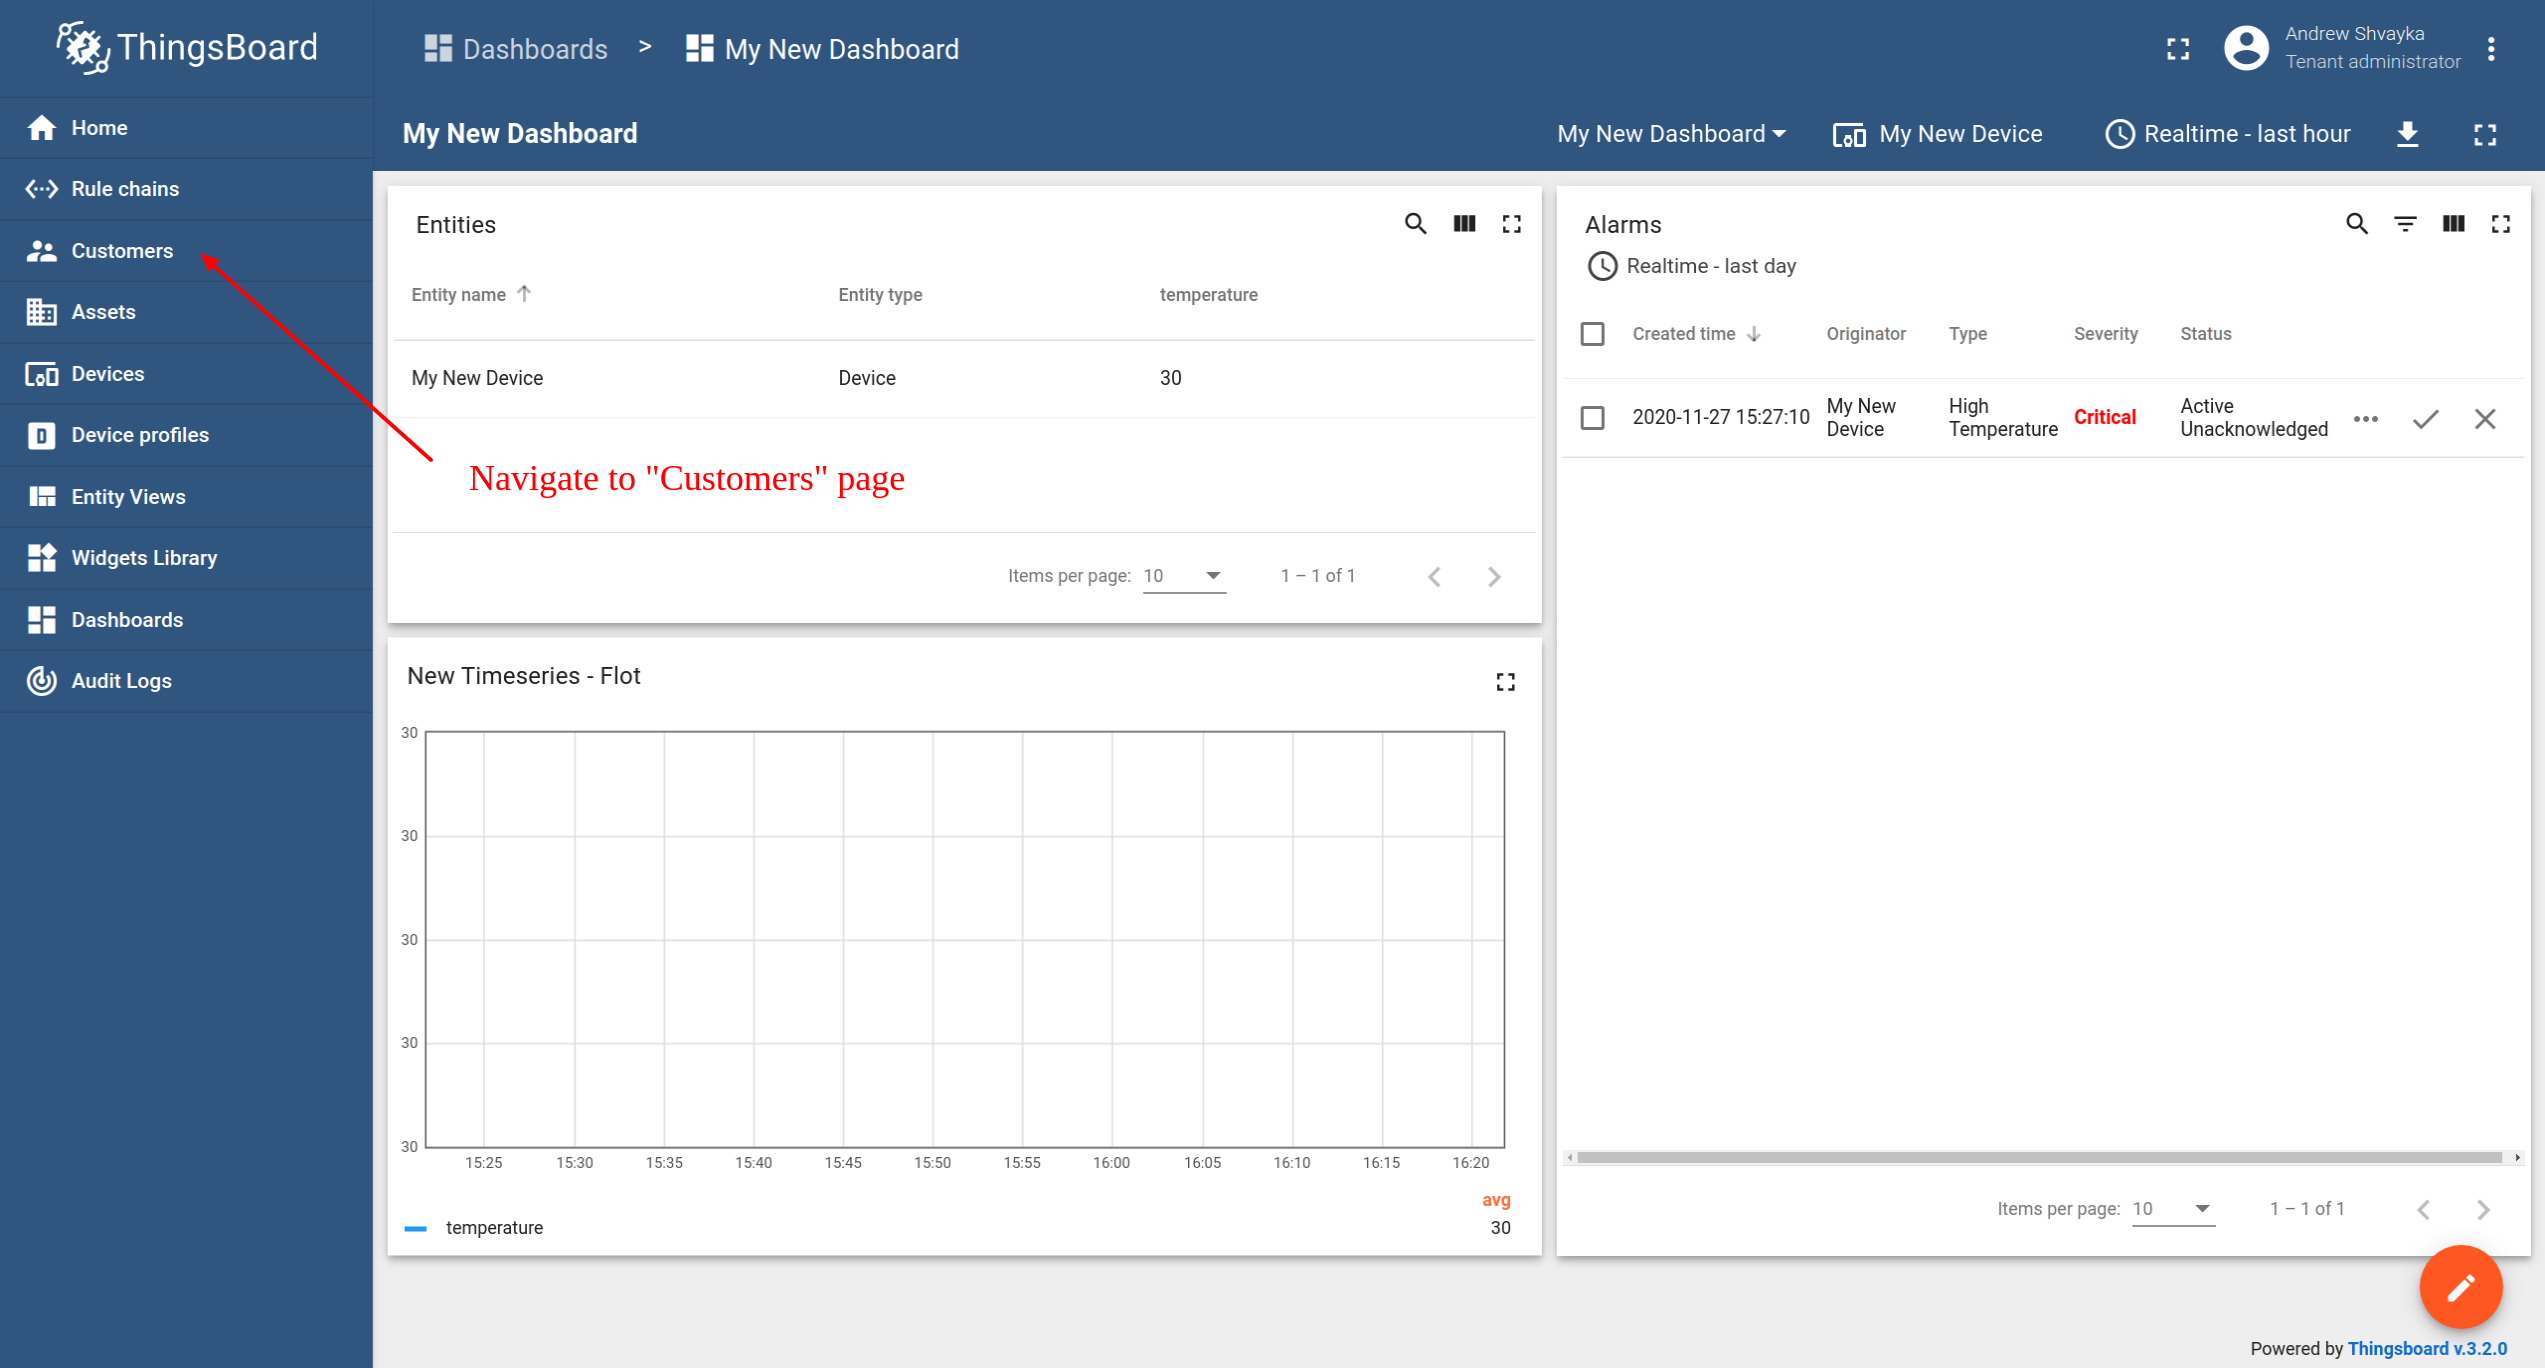
Navigate to the Customers page.
Click the “+” sign to add a customer.
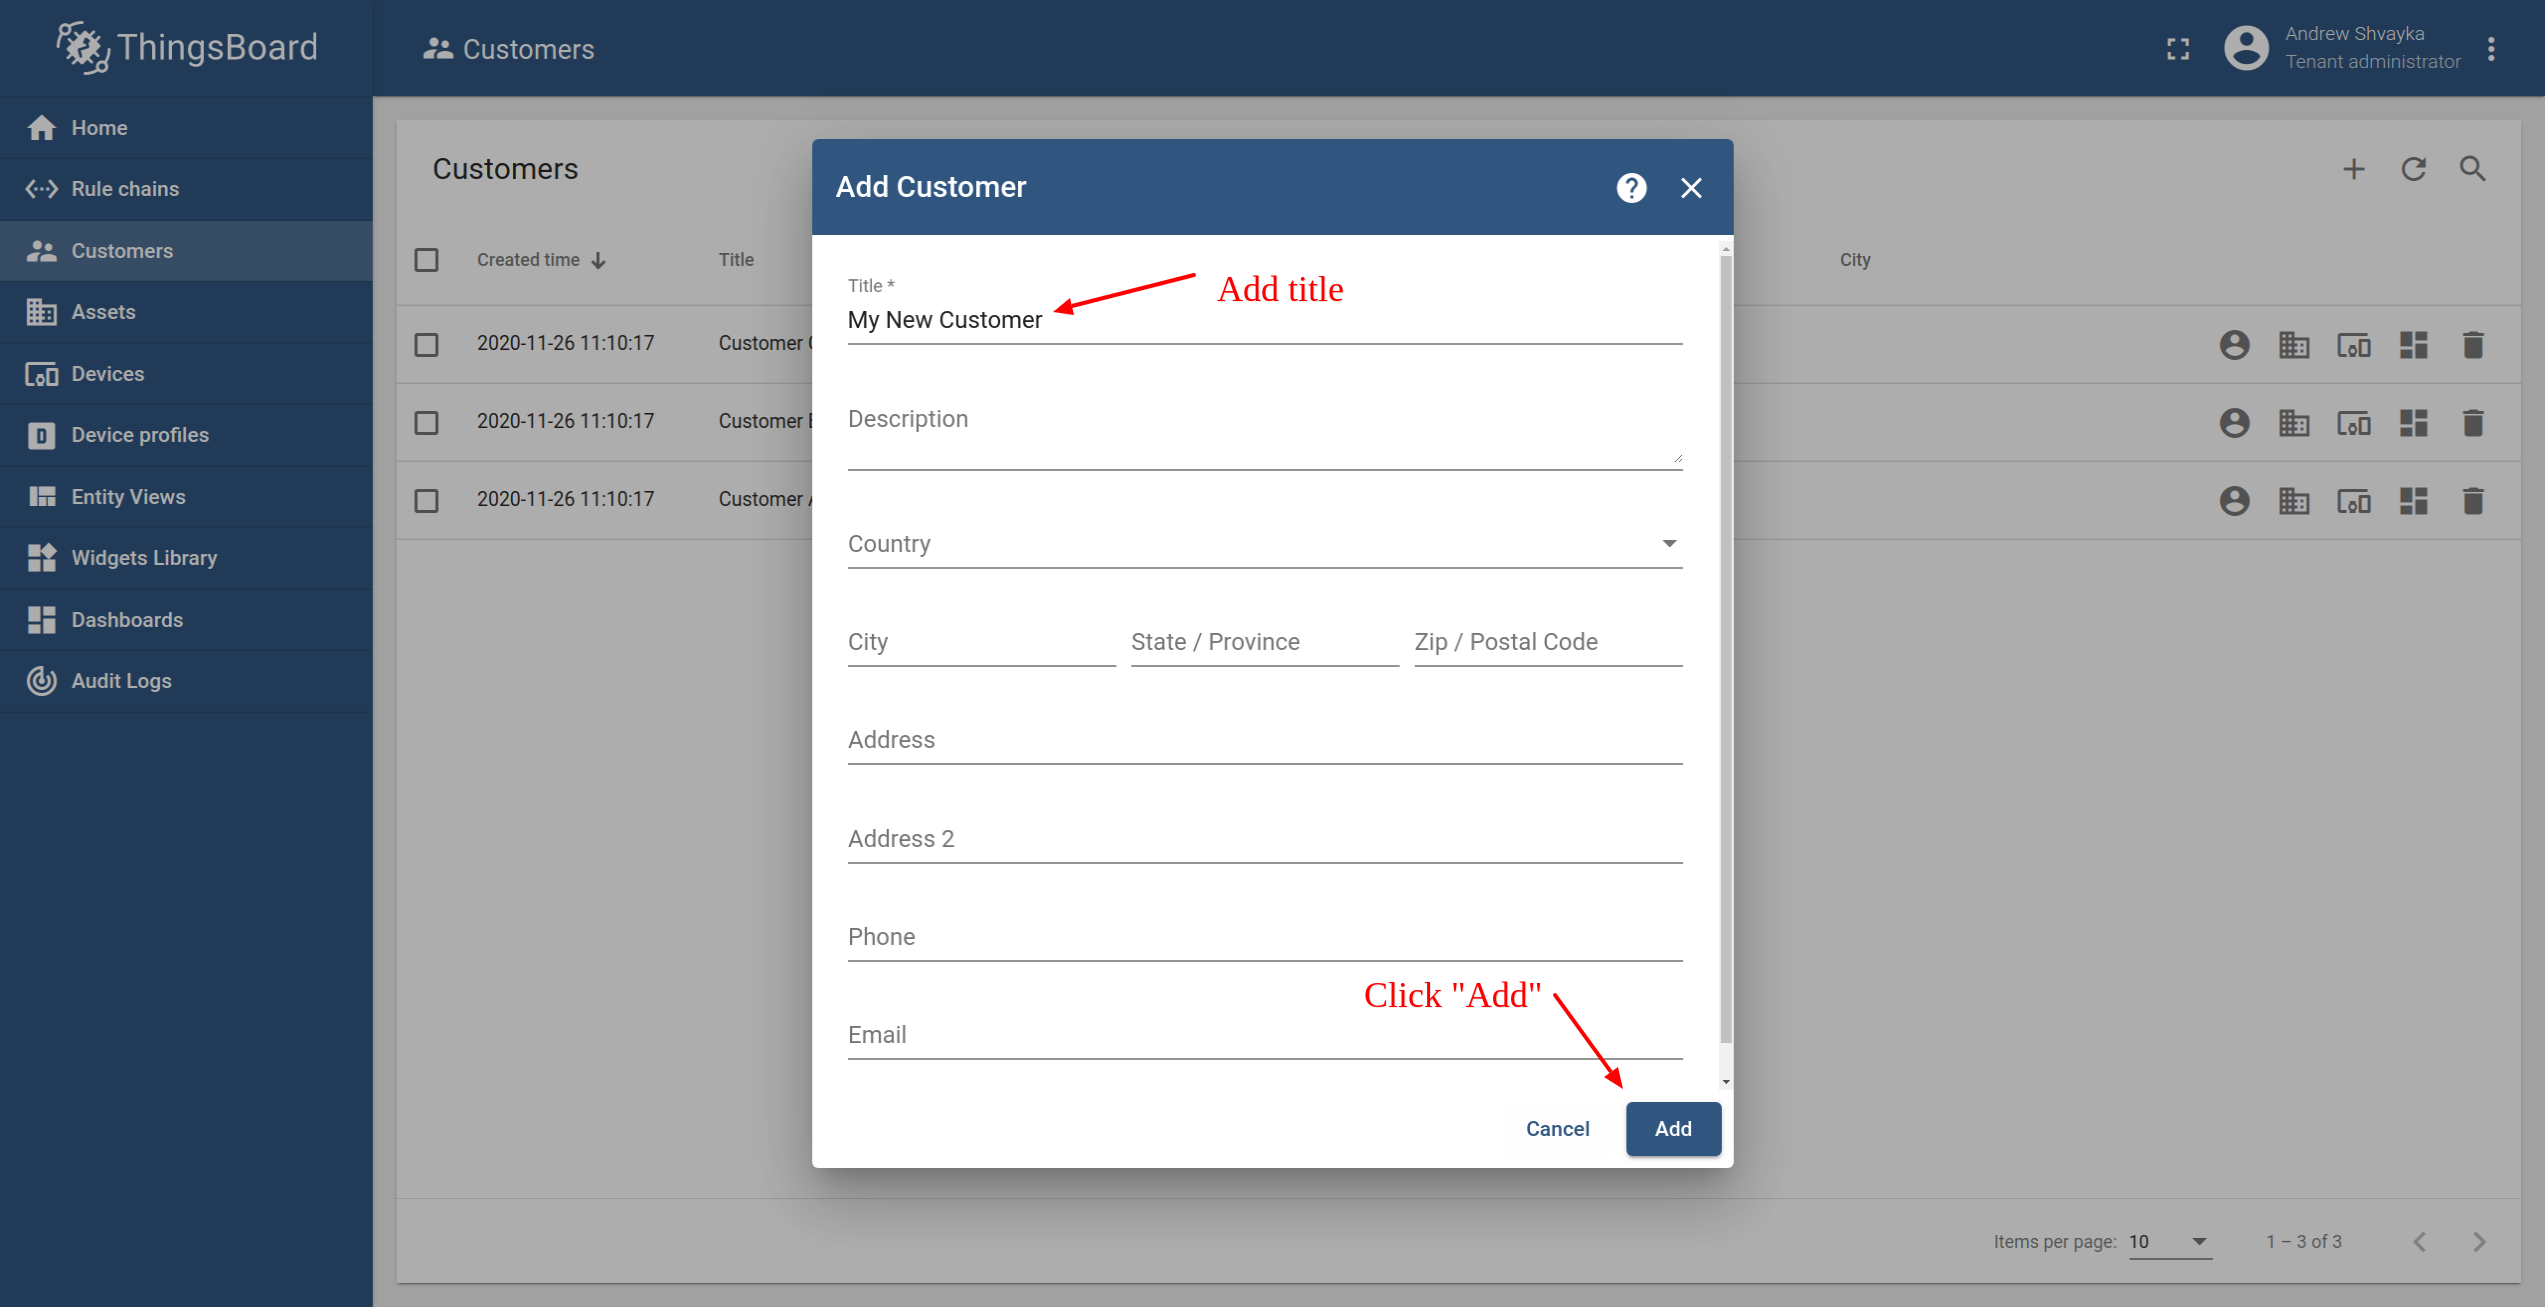
Add customer title and click “Add”.
Step 7.2 Assign dashboards to Customer
Let’s share our dashboard with the Customer. The Customer users will have read-only access to the Dashboard.
Step 7.3 Assign device to Customer
Let’s assign device to the Customer. The Customer users will have ability to read and write telemetry and send commands to devices.
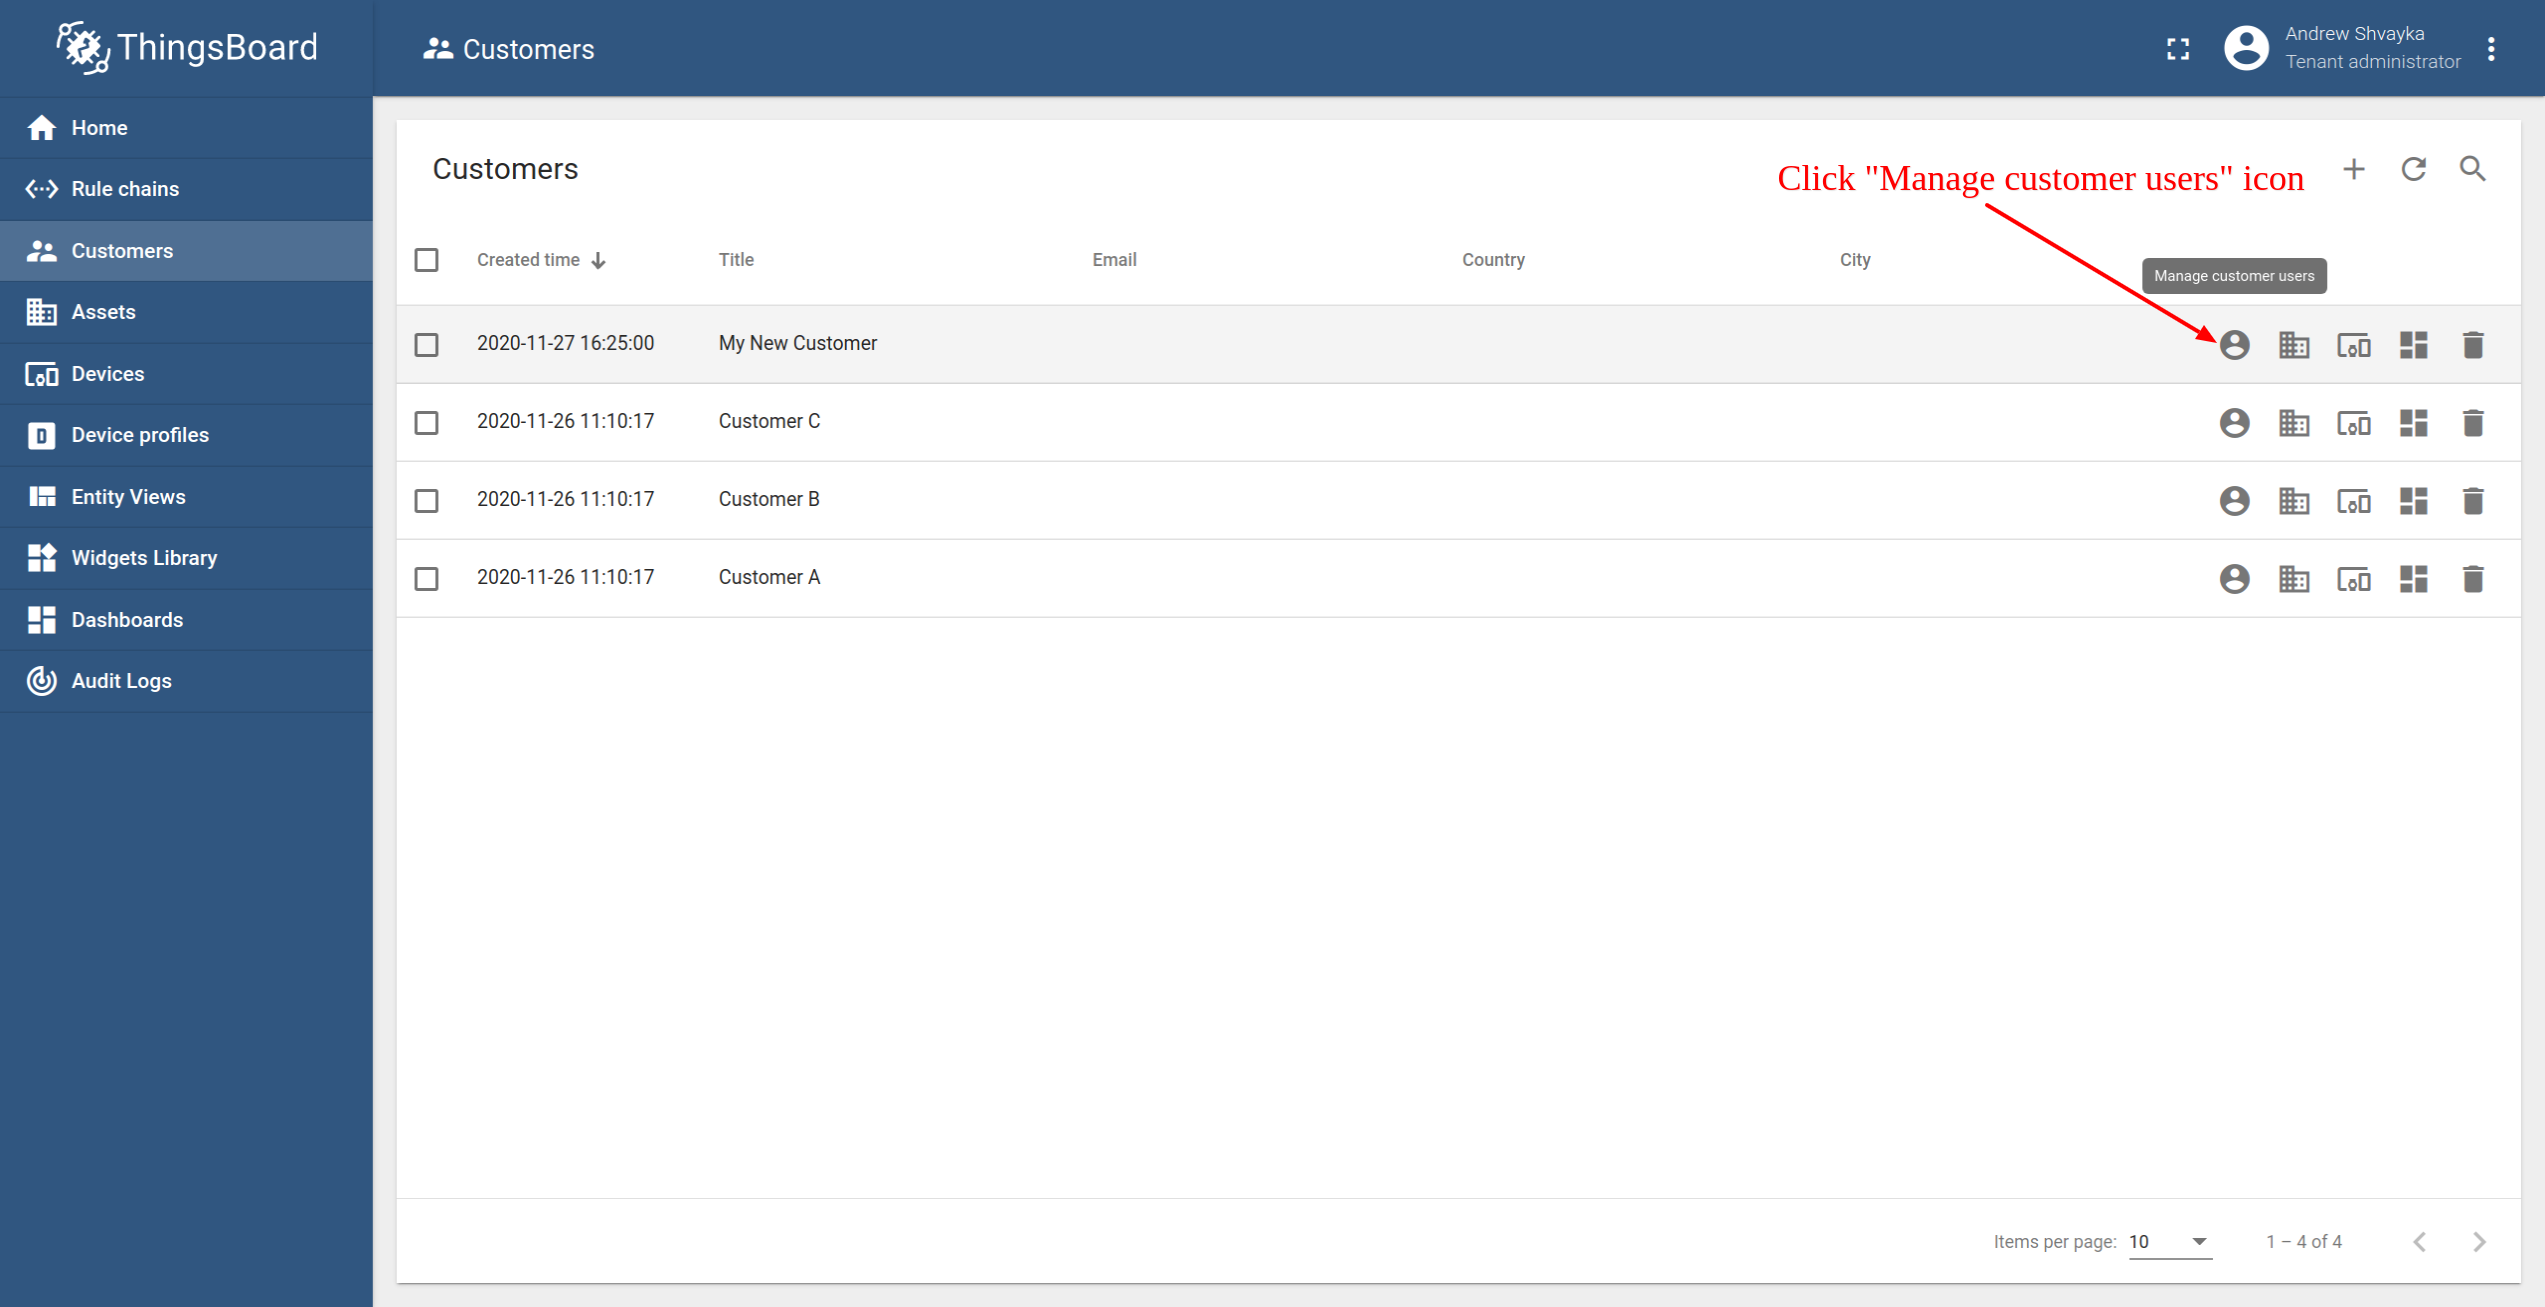
Step 7.4 Create customer user
Finally, let’s create a user that will belong to the customer and will have read-only access to the dashboard and the device. You may optionally configure the dashboard to appear just after user login to the platform web UI.
Navigate back to the “Customers” page and click the “manage customer users” icon.
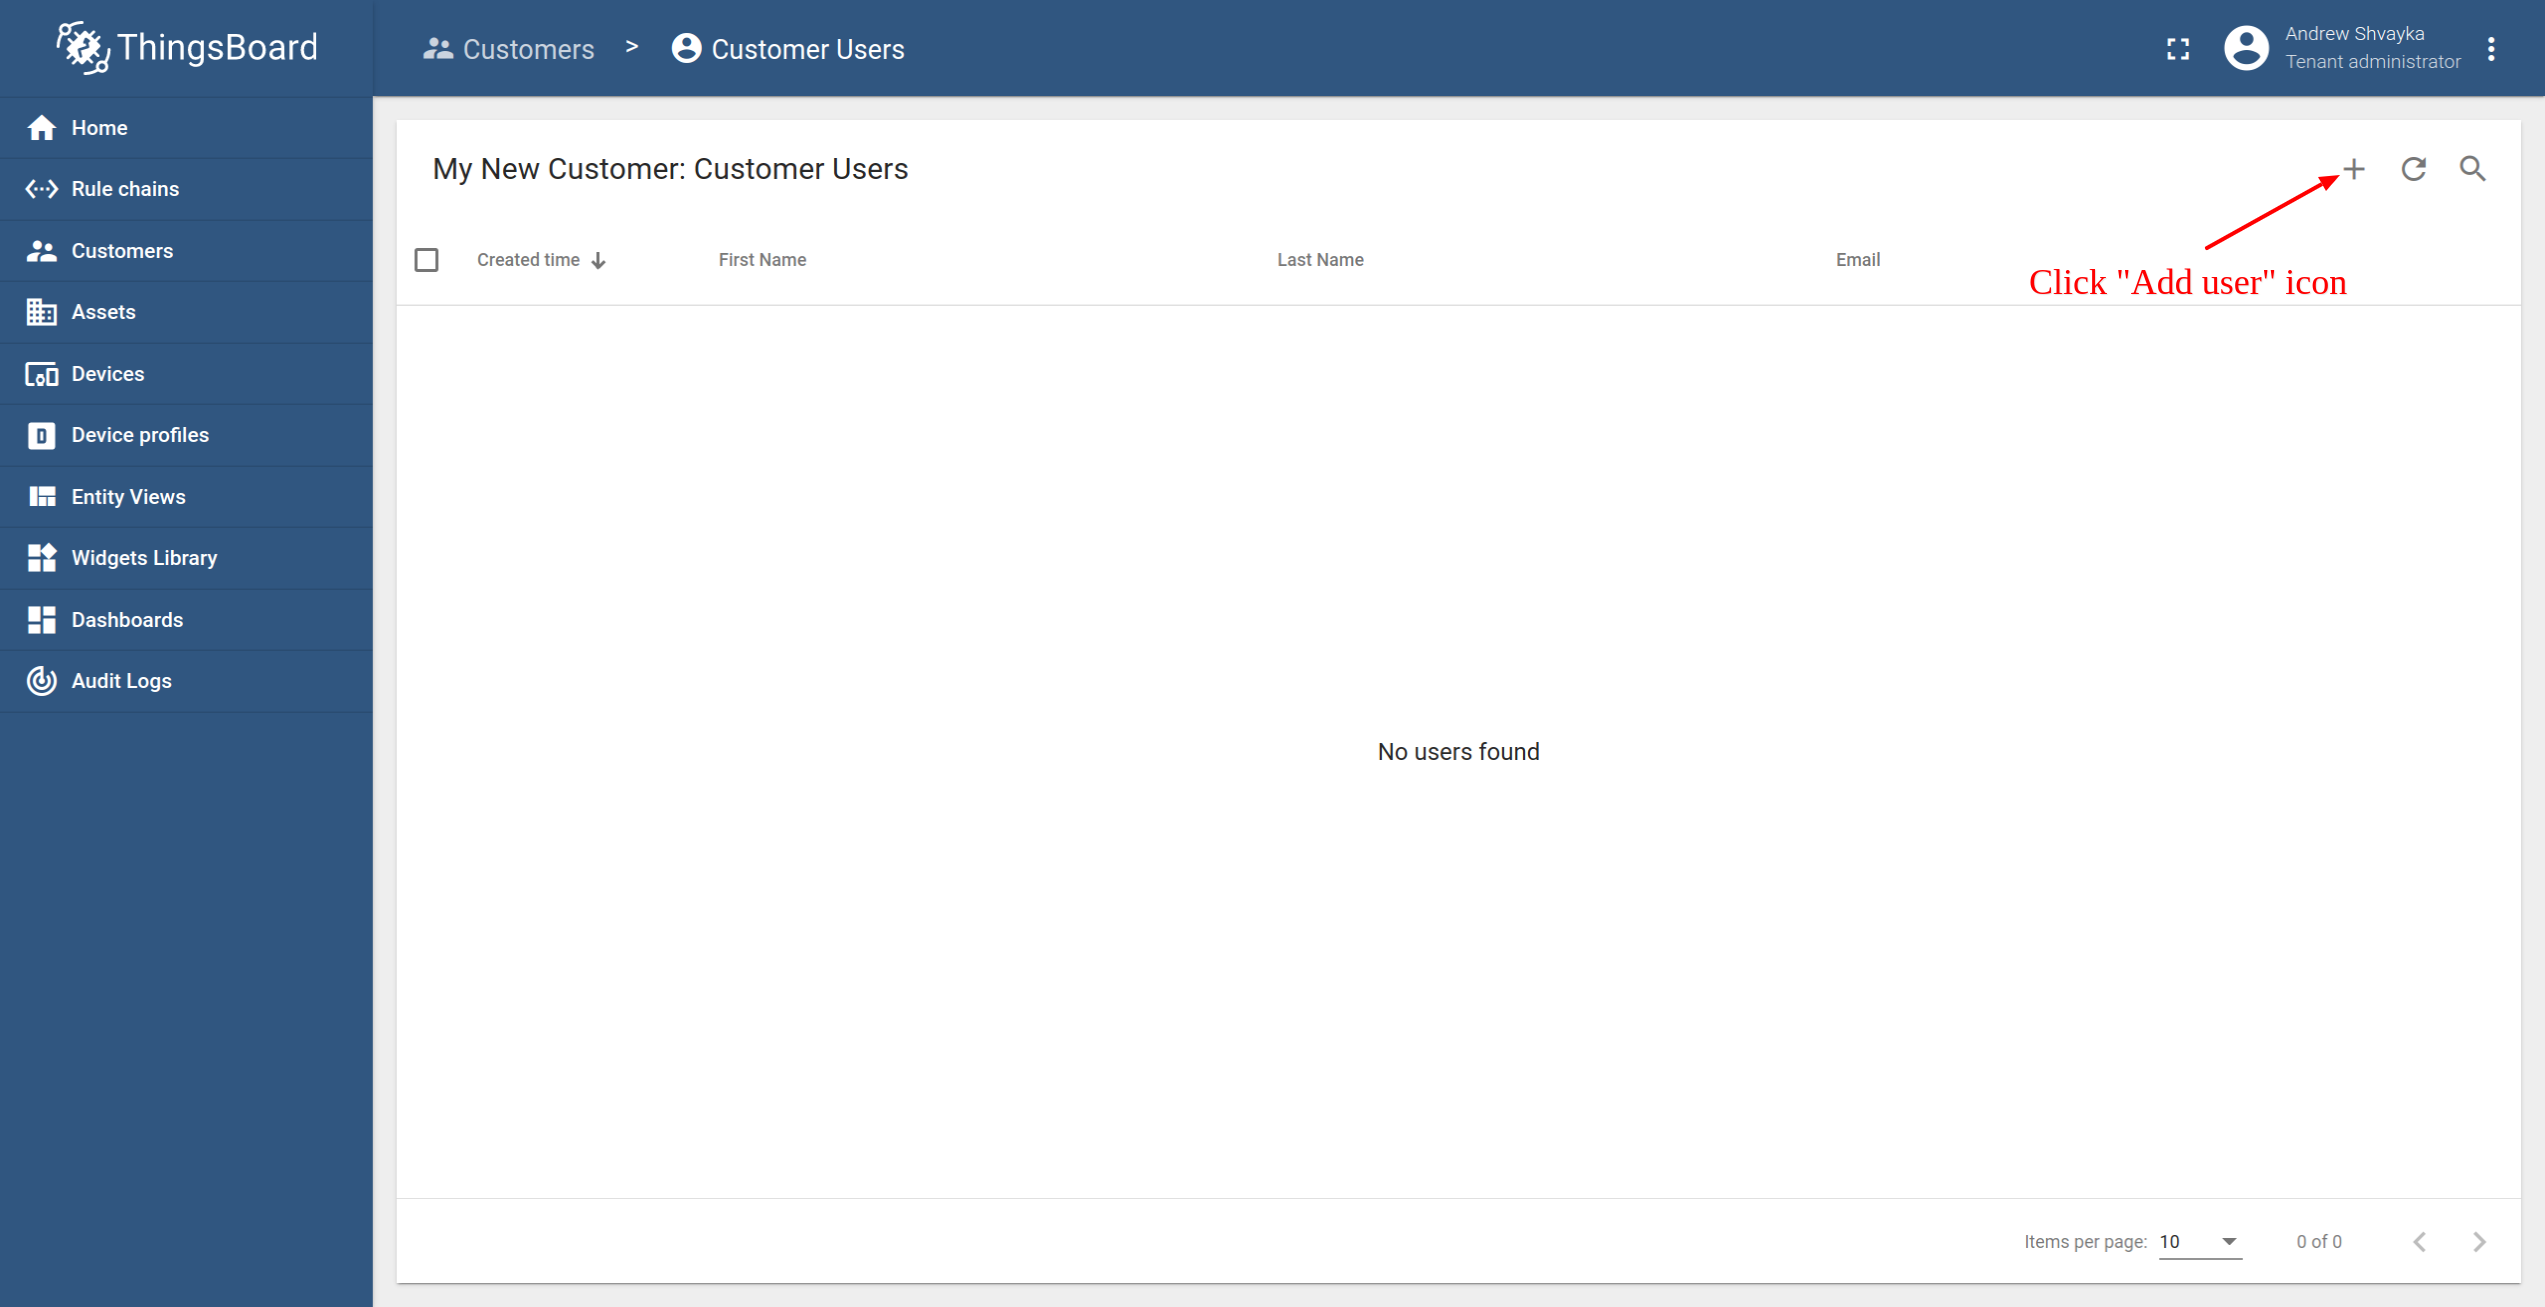
Click the “Add user” icon.
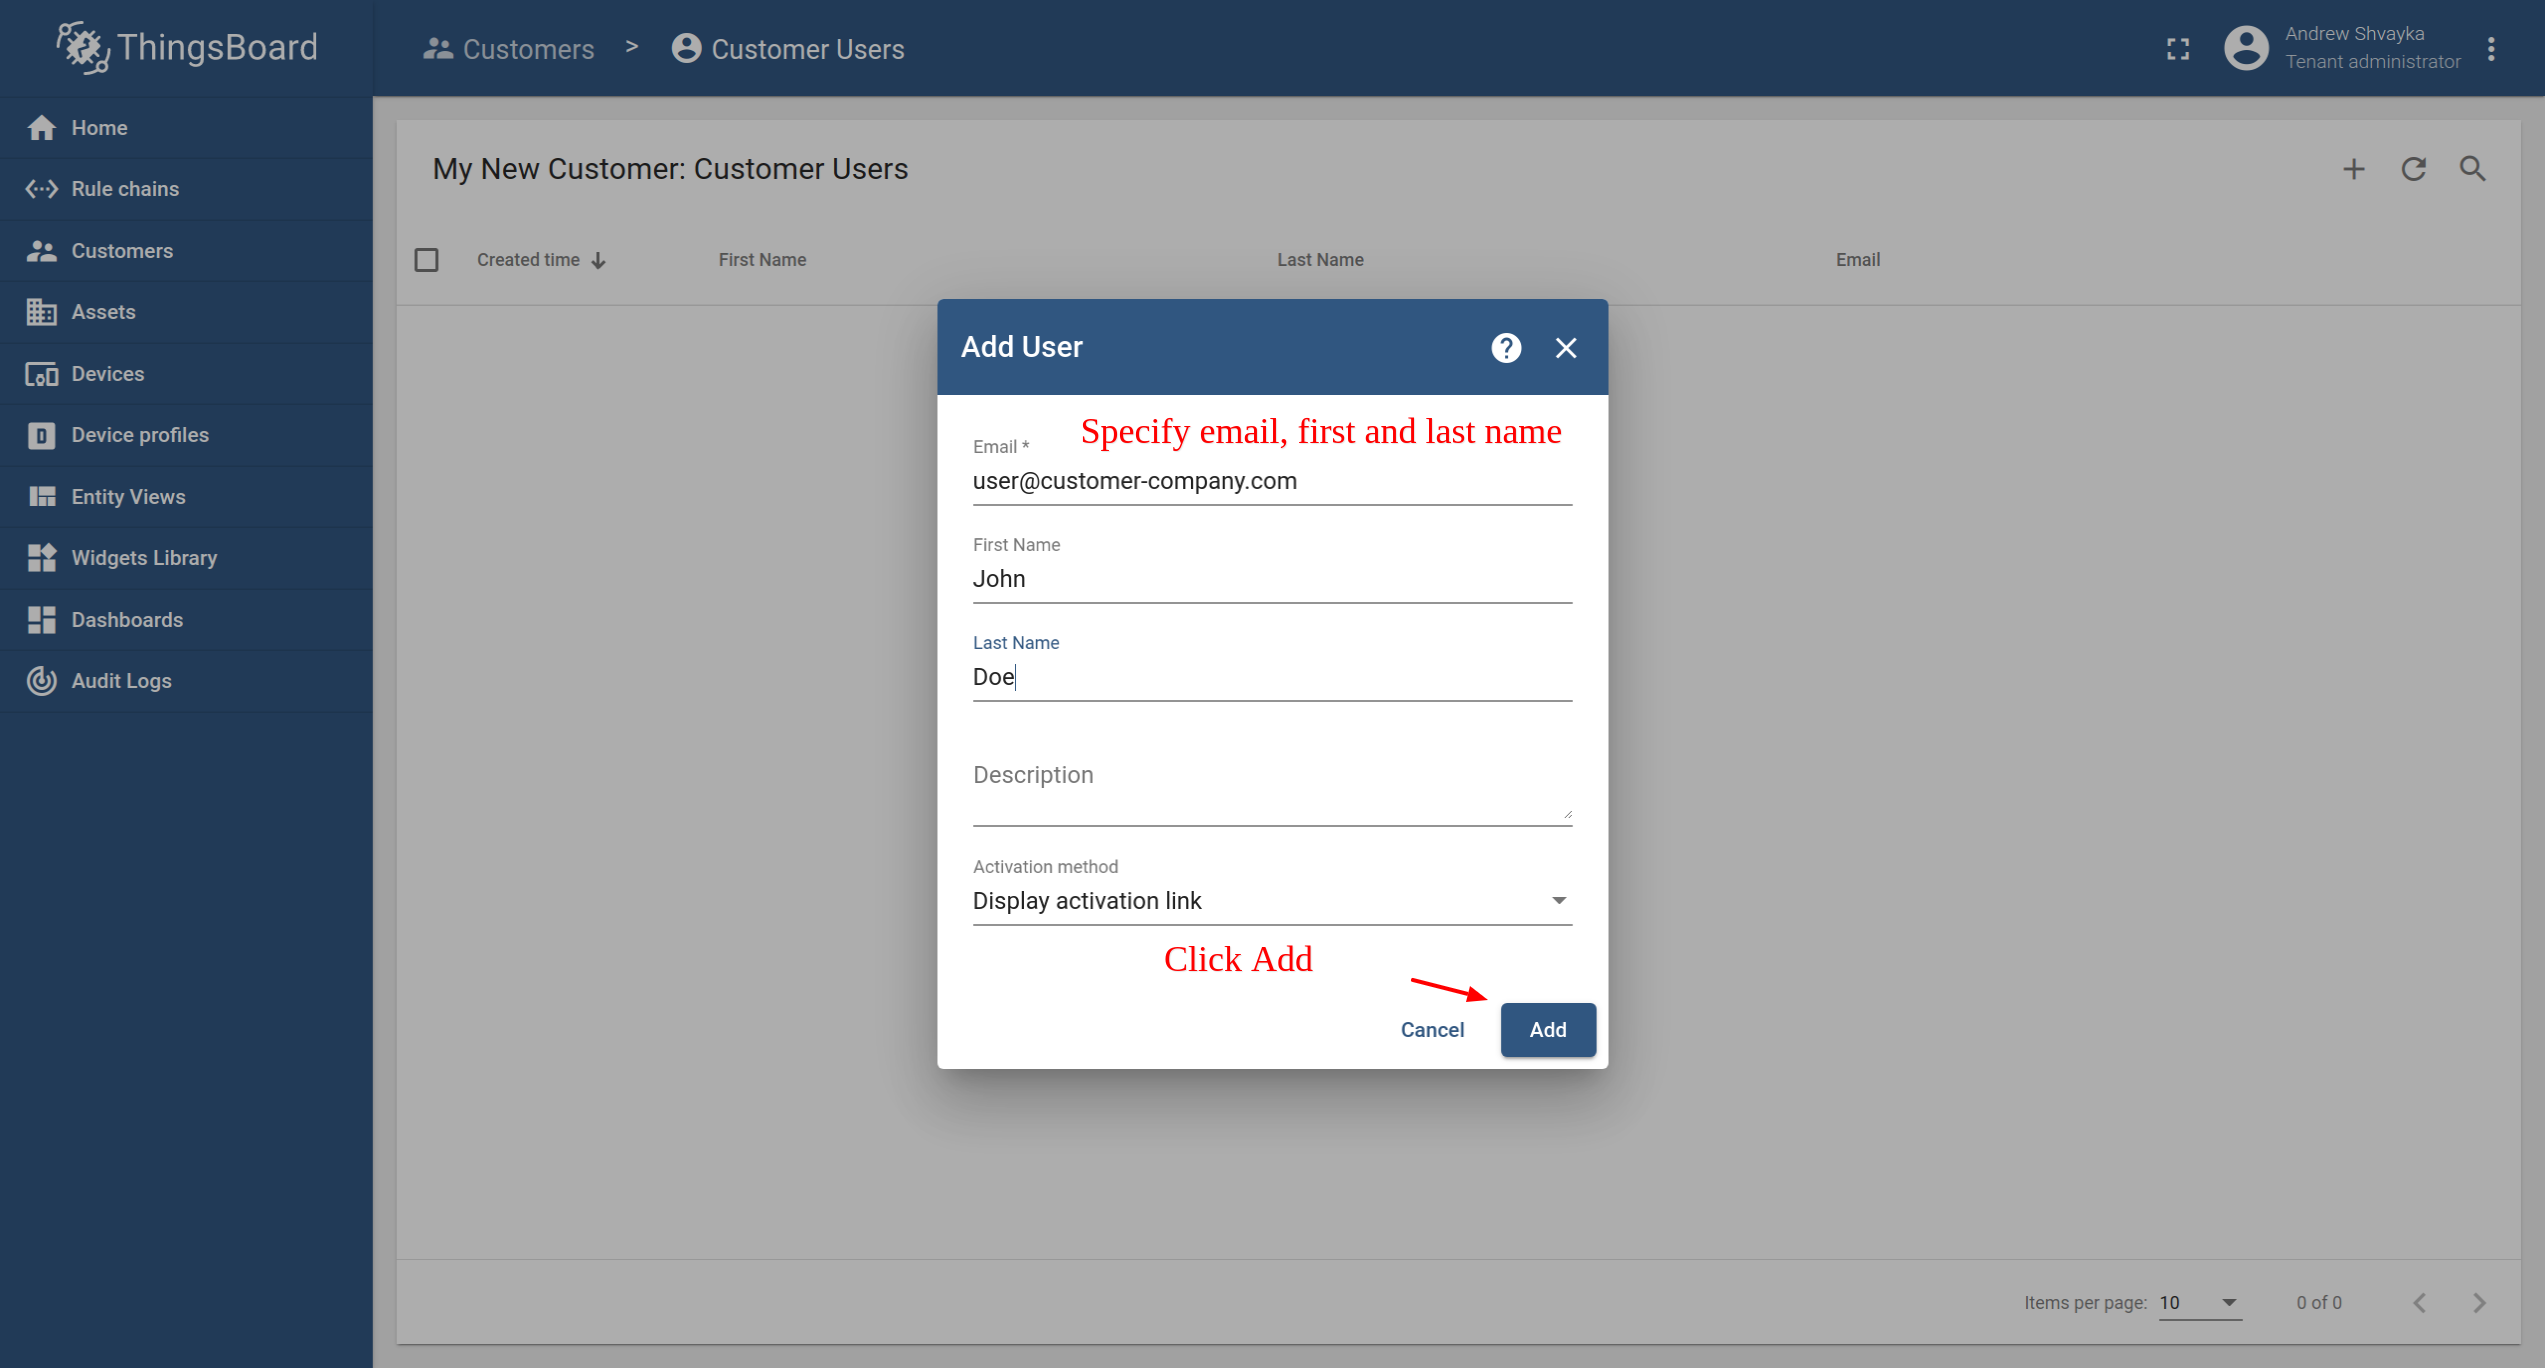
Specify email that you will use to login as a customer user and click “Add”.
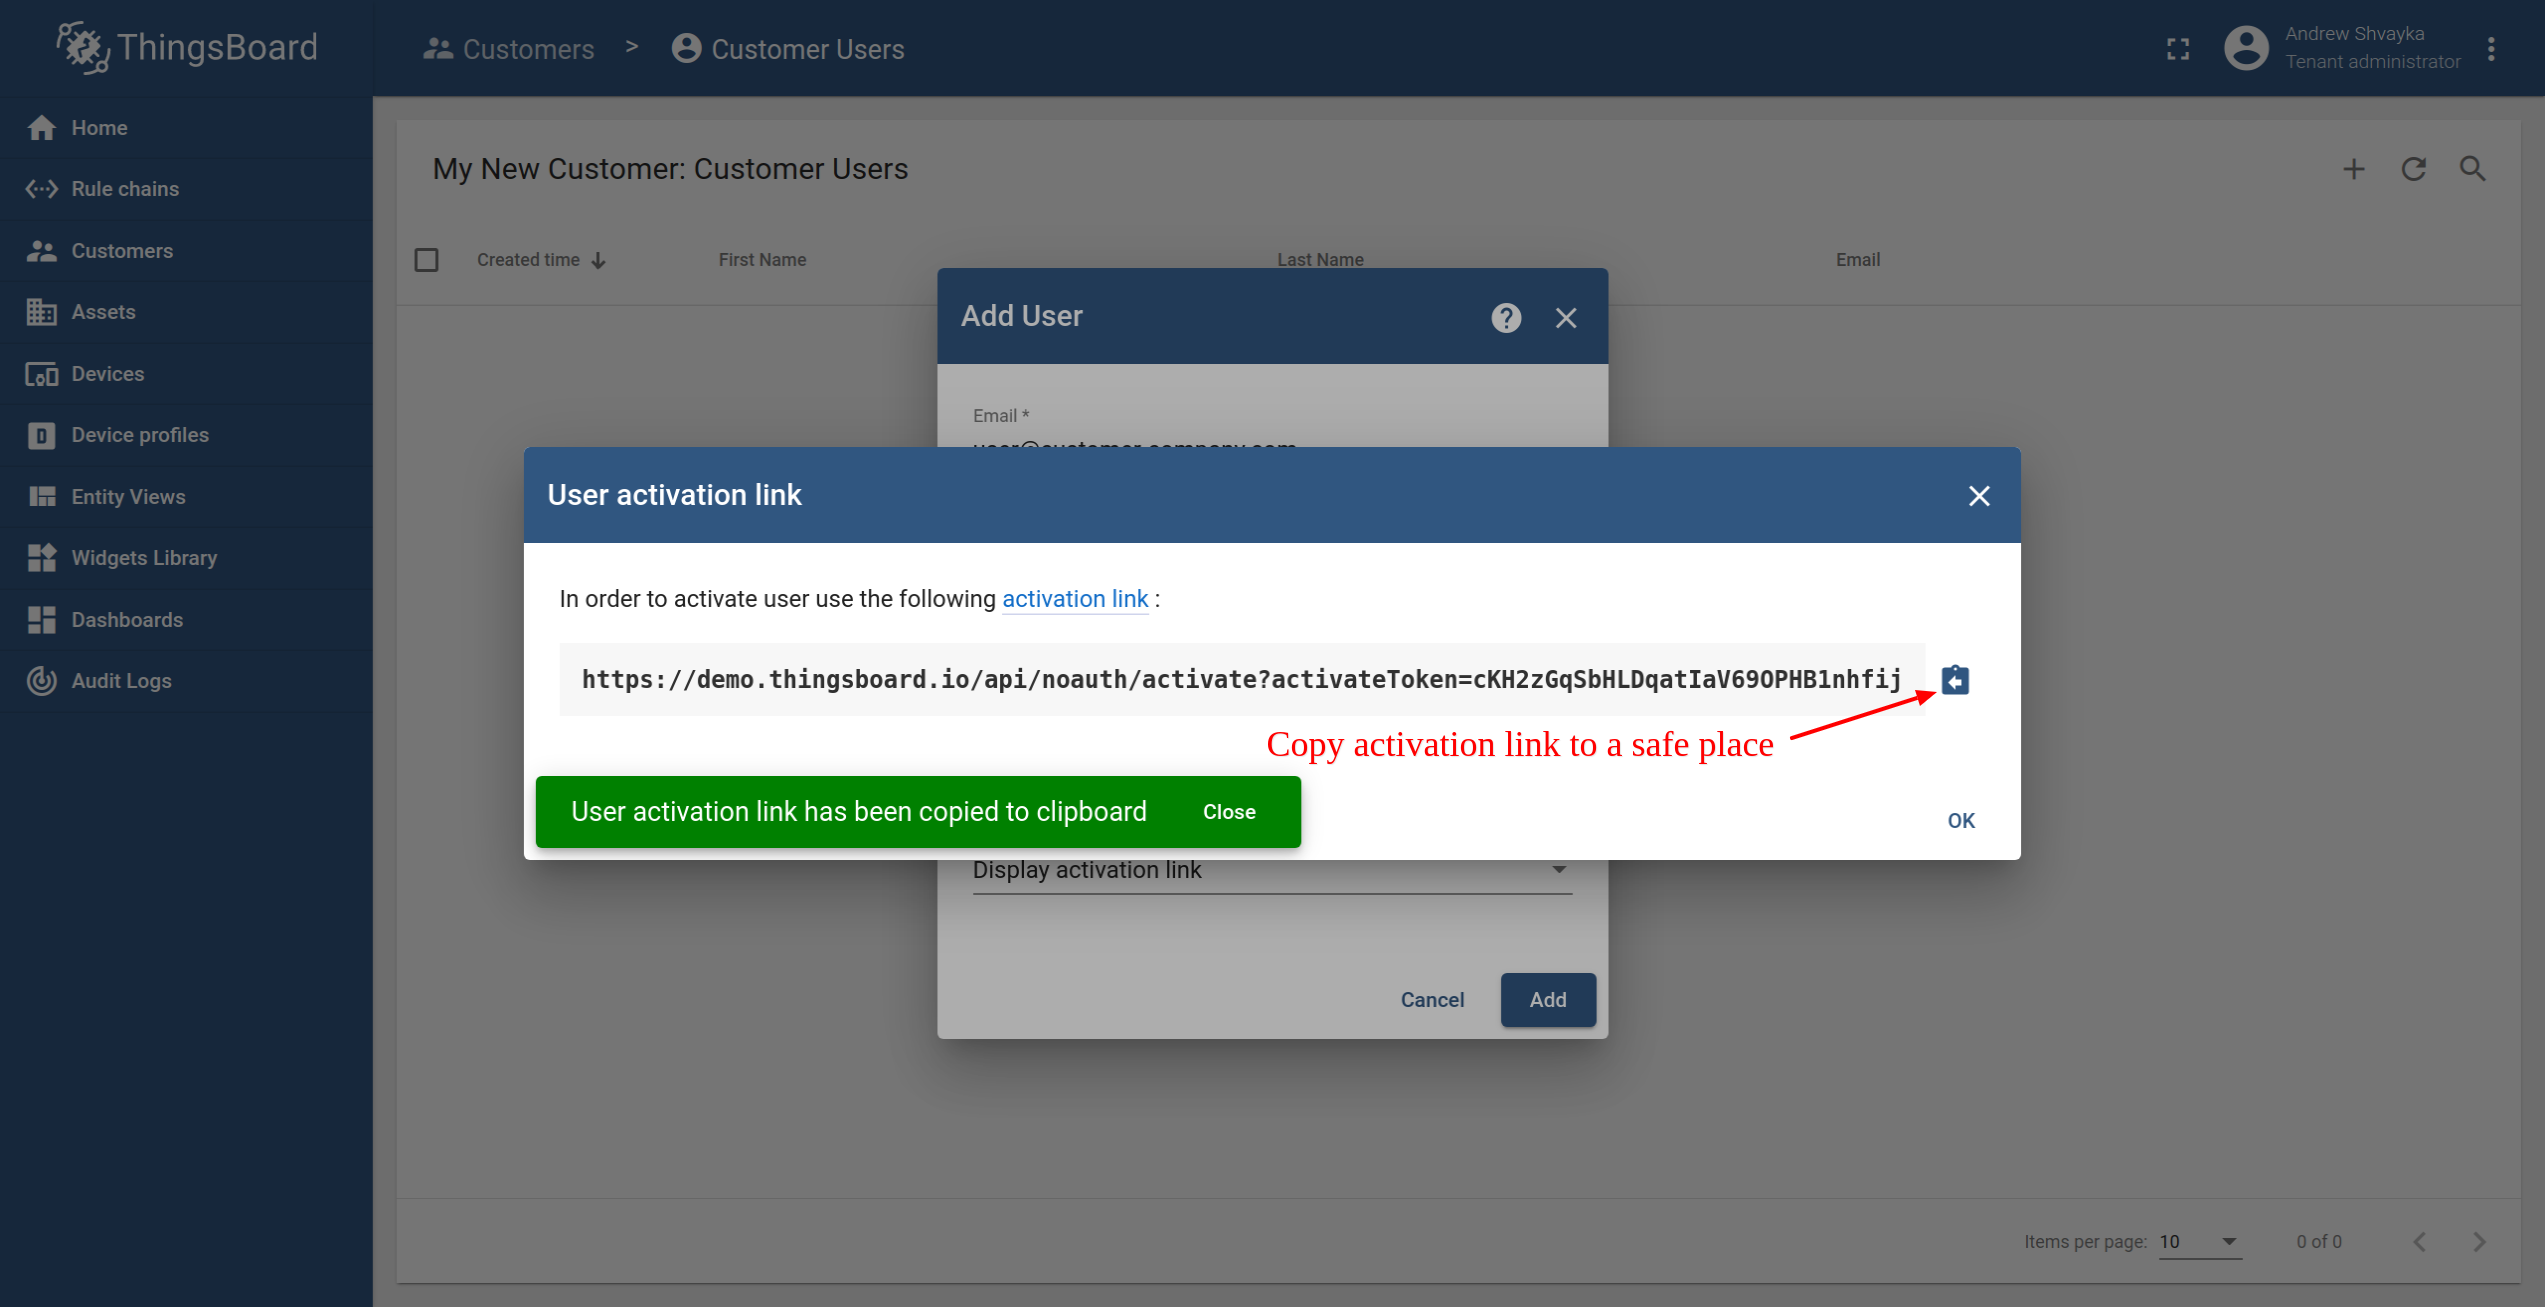
Copy the activation link and save it to a safe place. You will use it later to set the password.
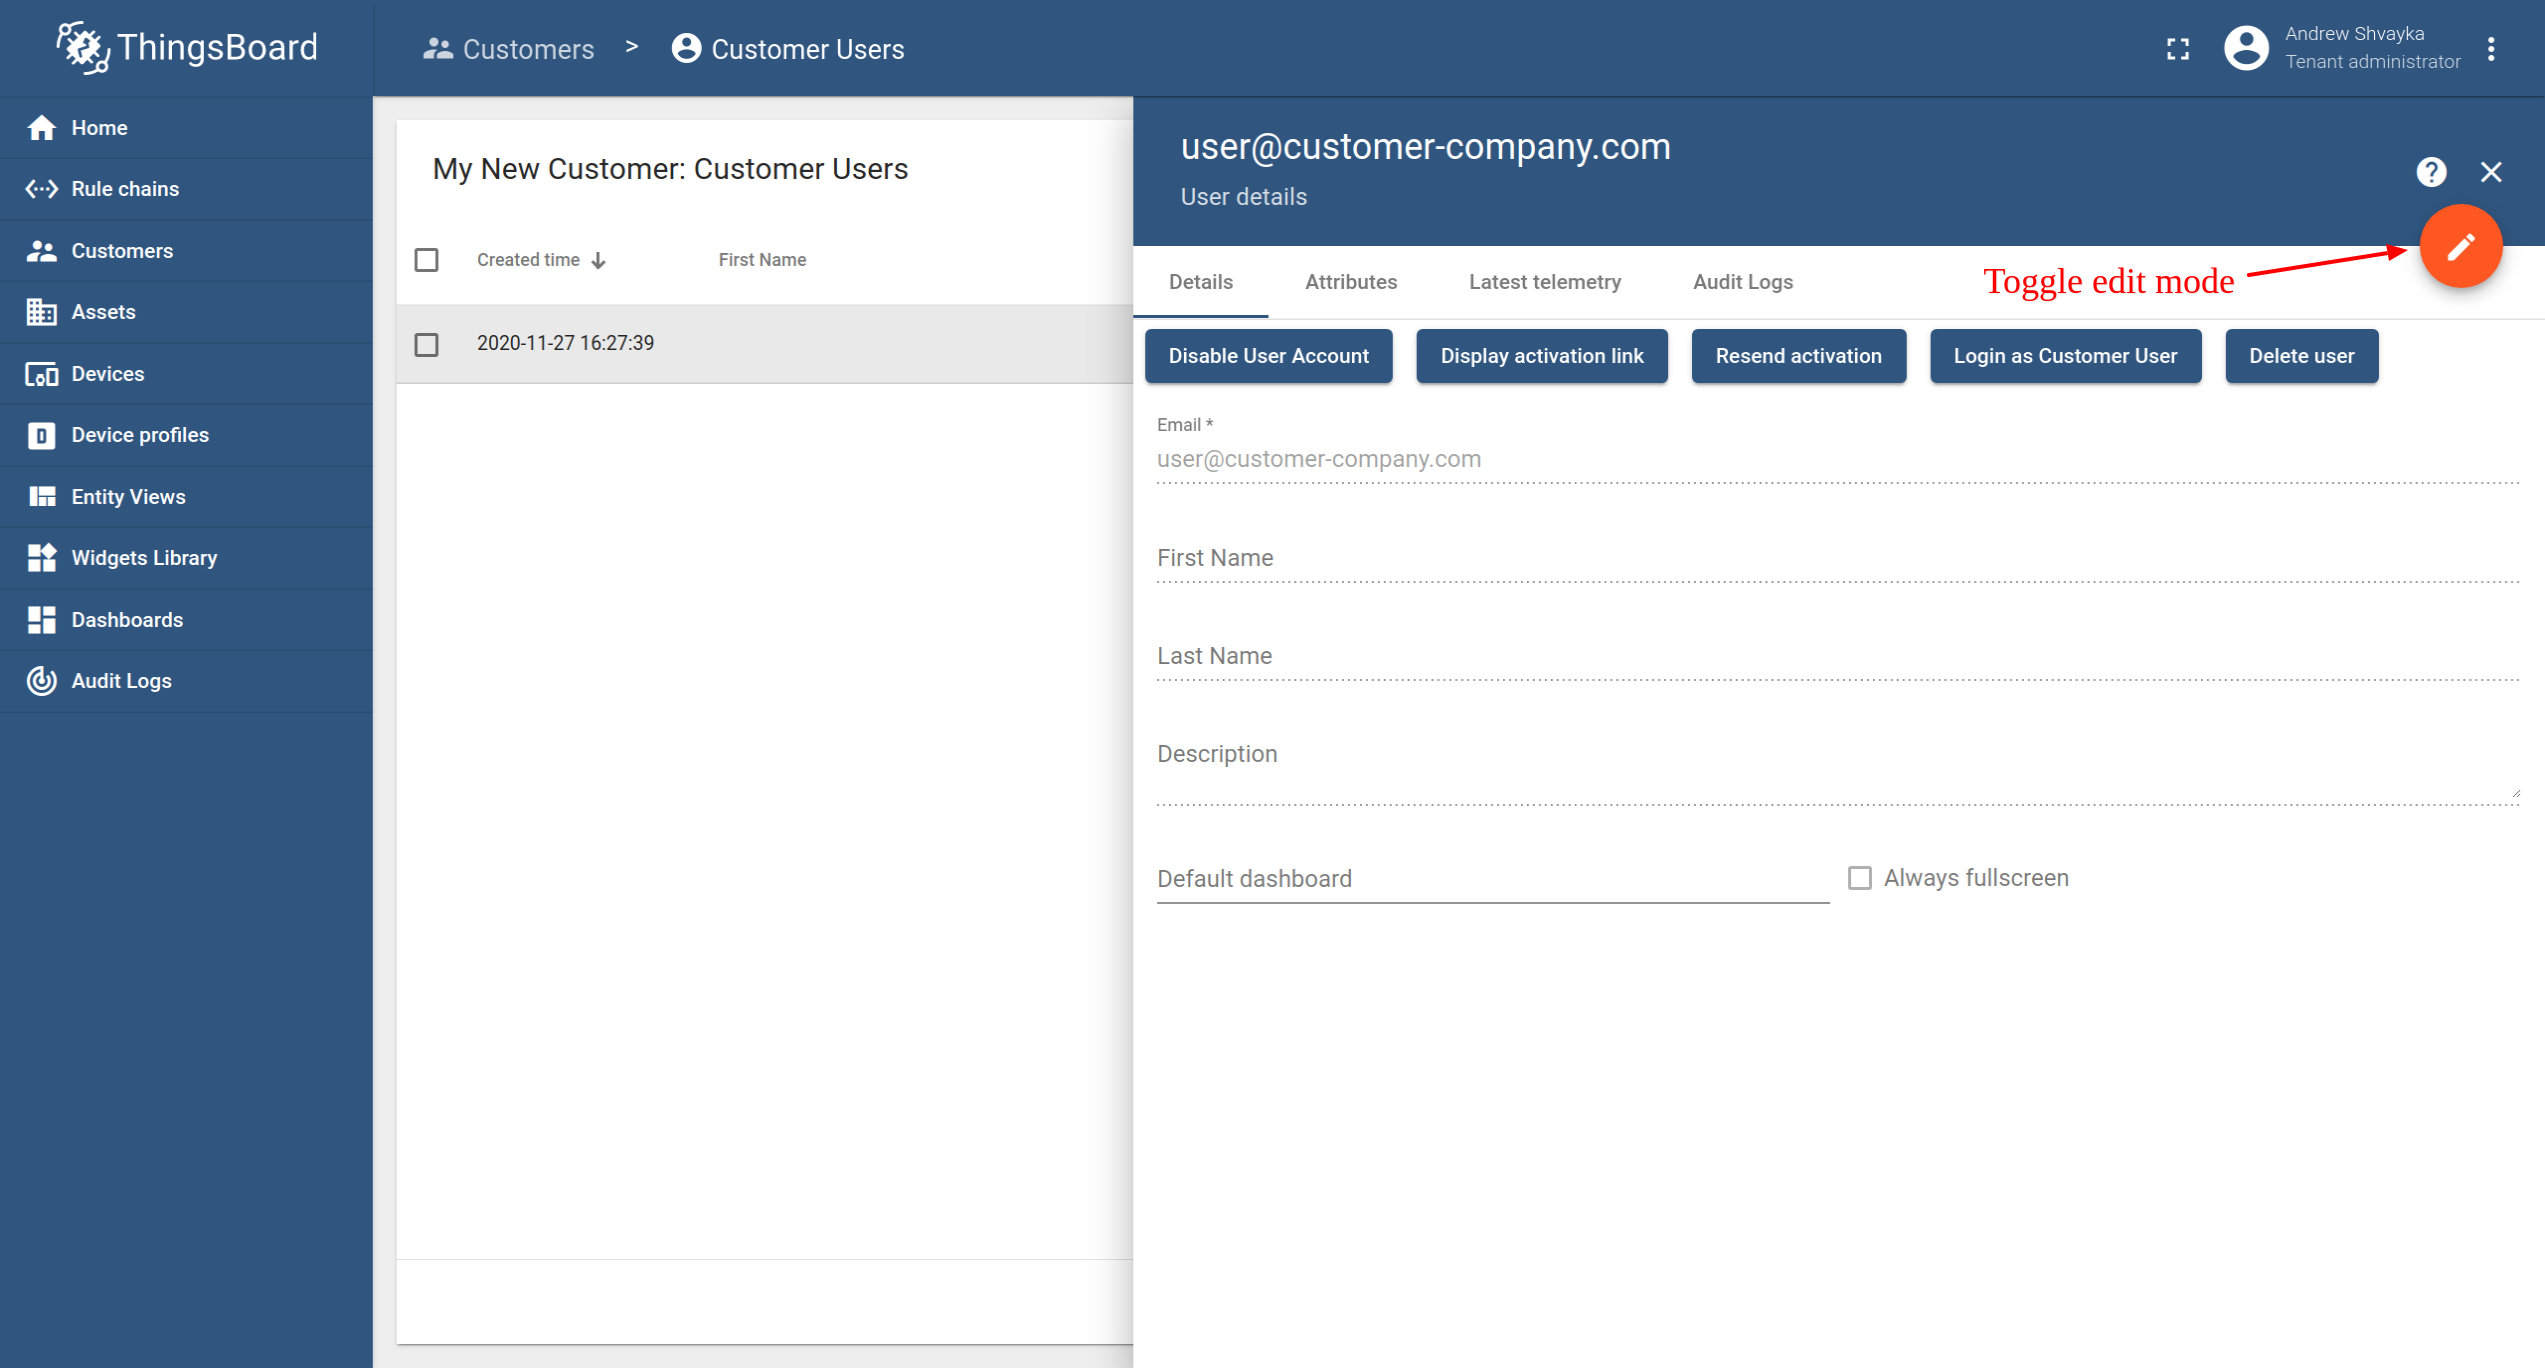
Open user details.

(Option) Toggle edit mode.
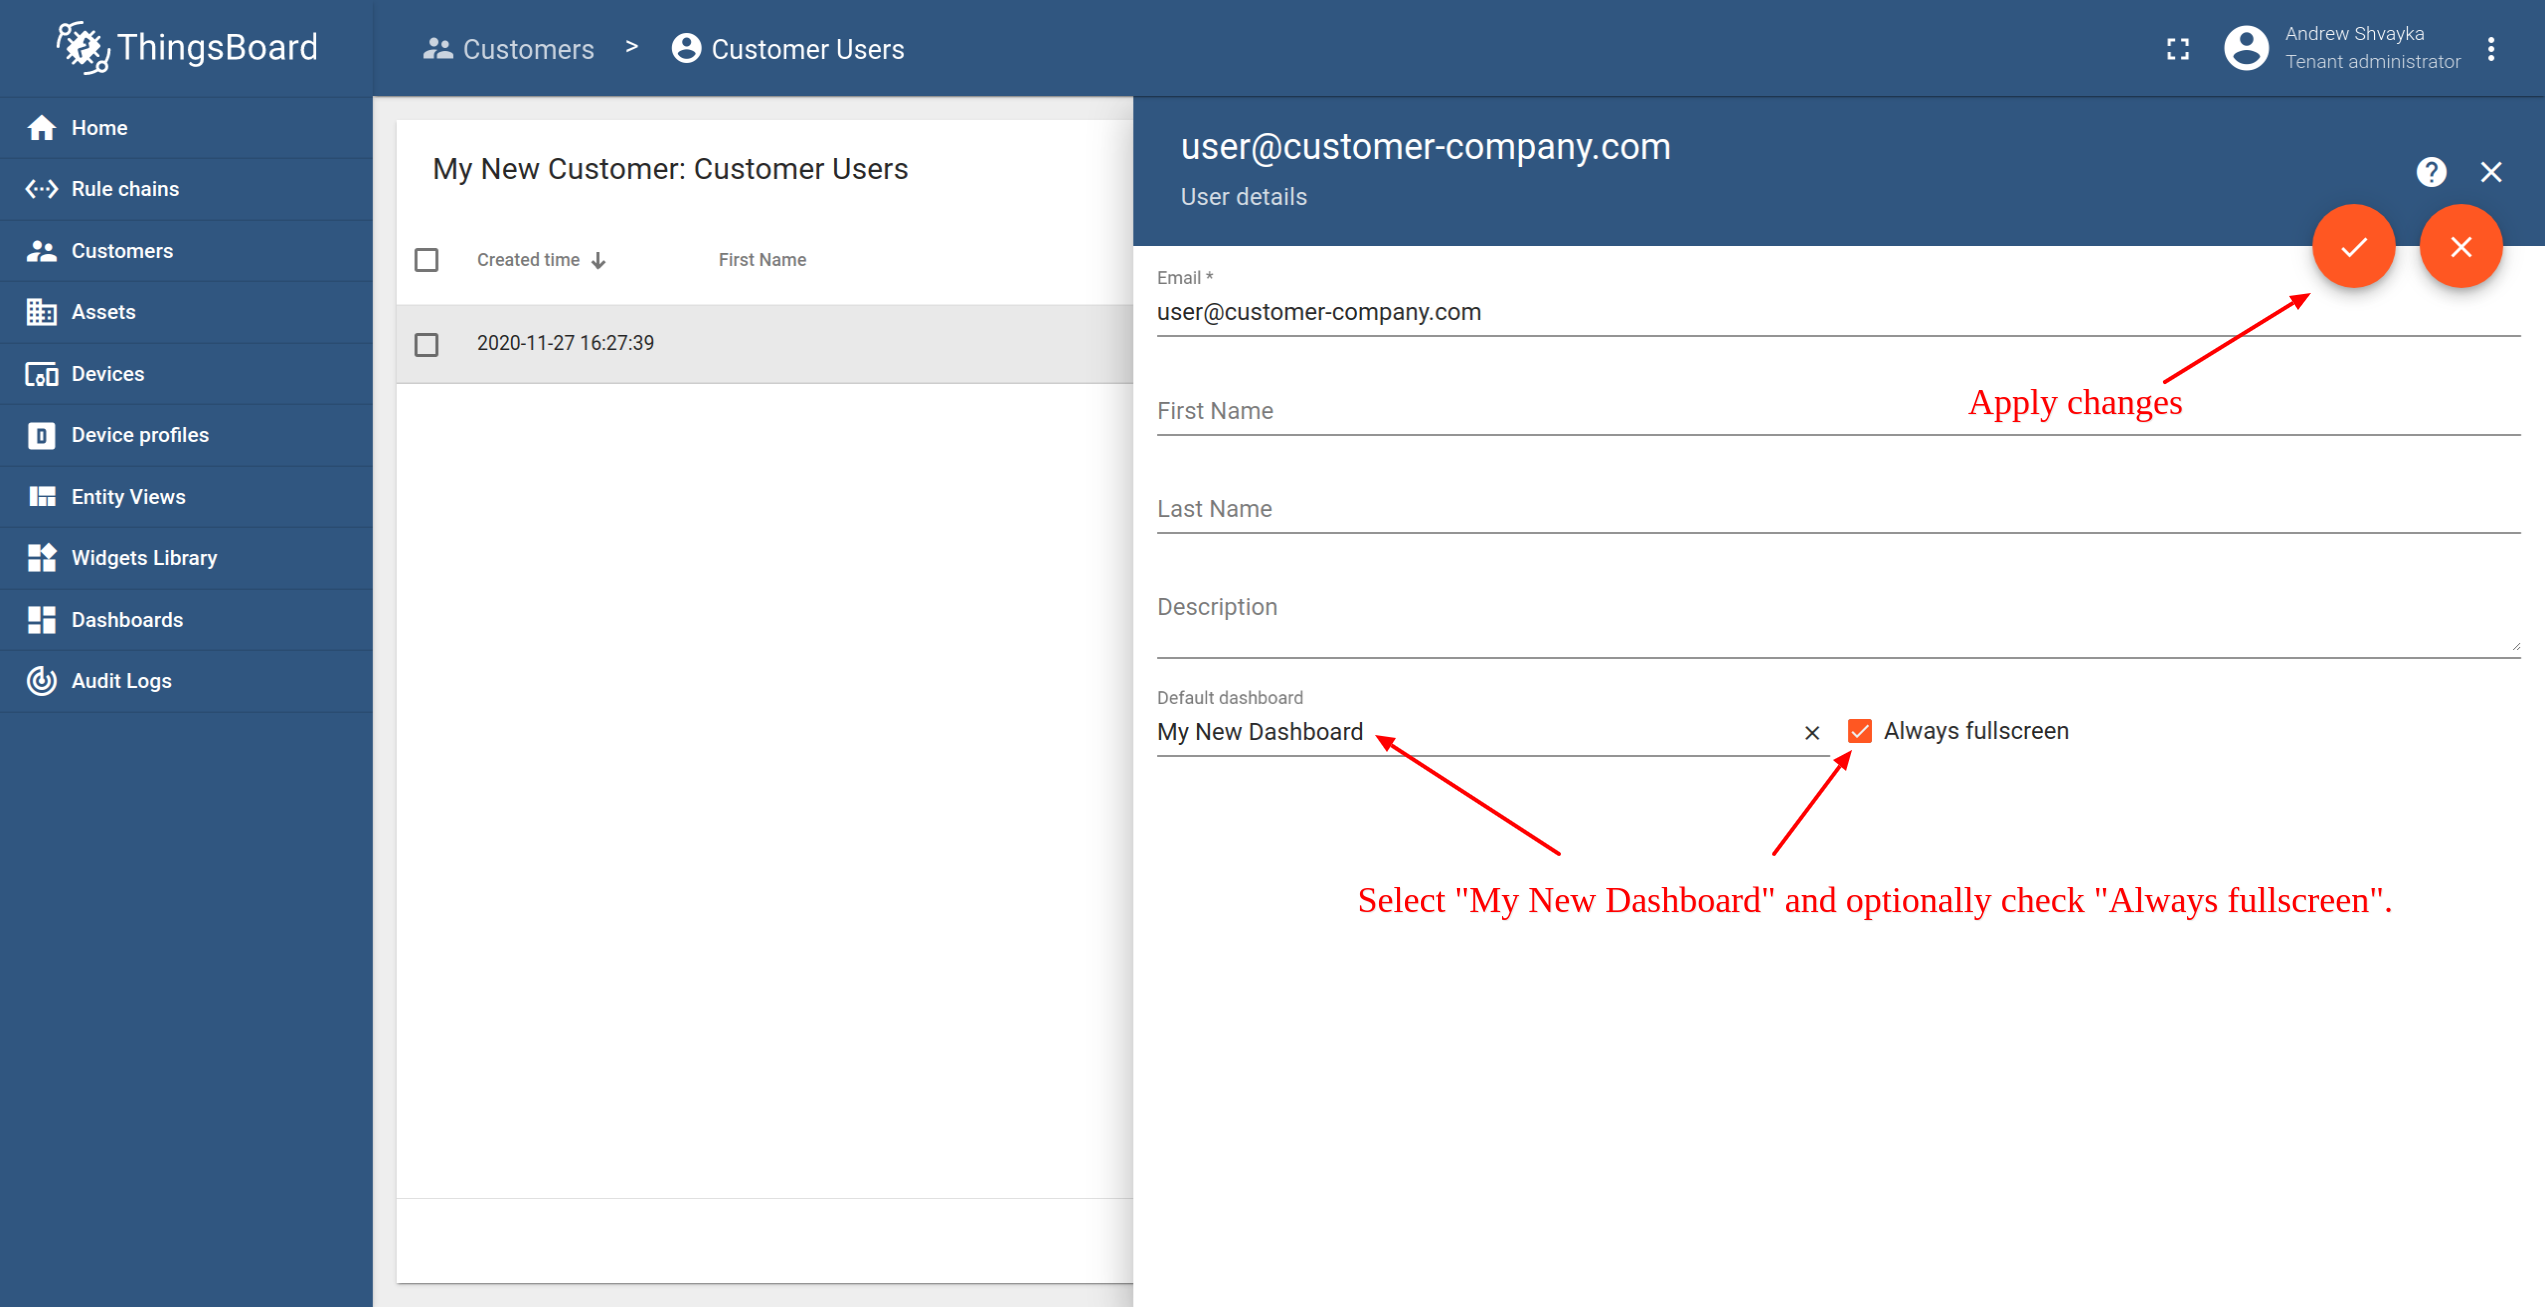
(Option) Select default dashboard and check “Always fullscreen”. Apply changes.
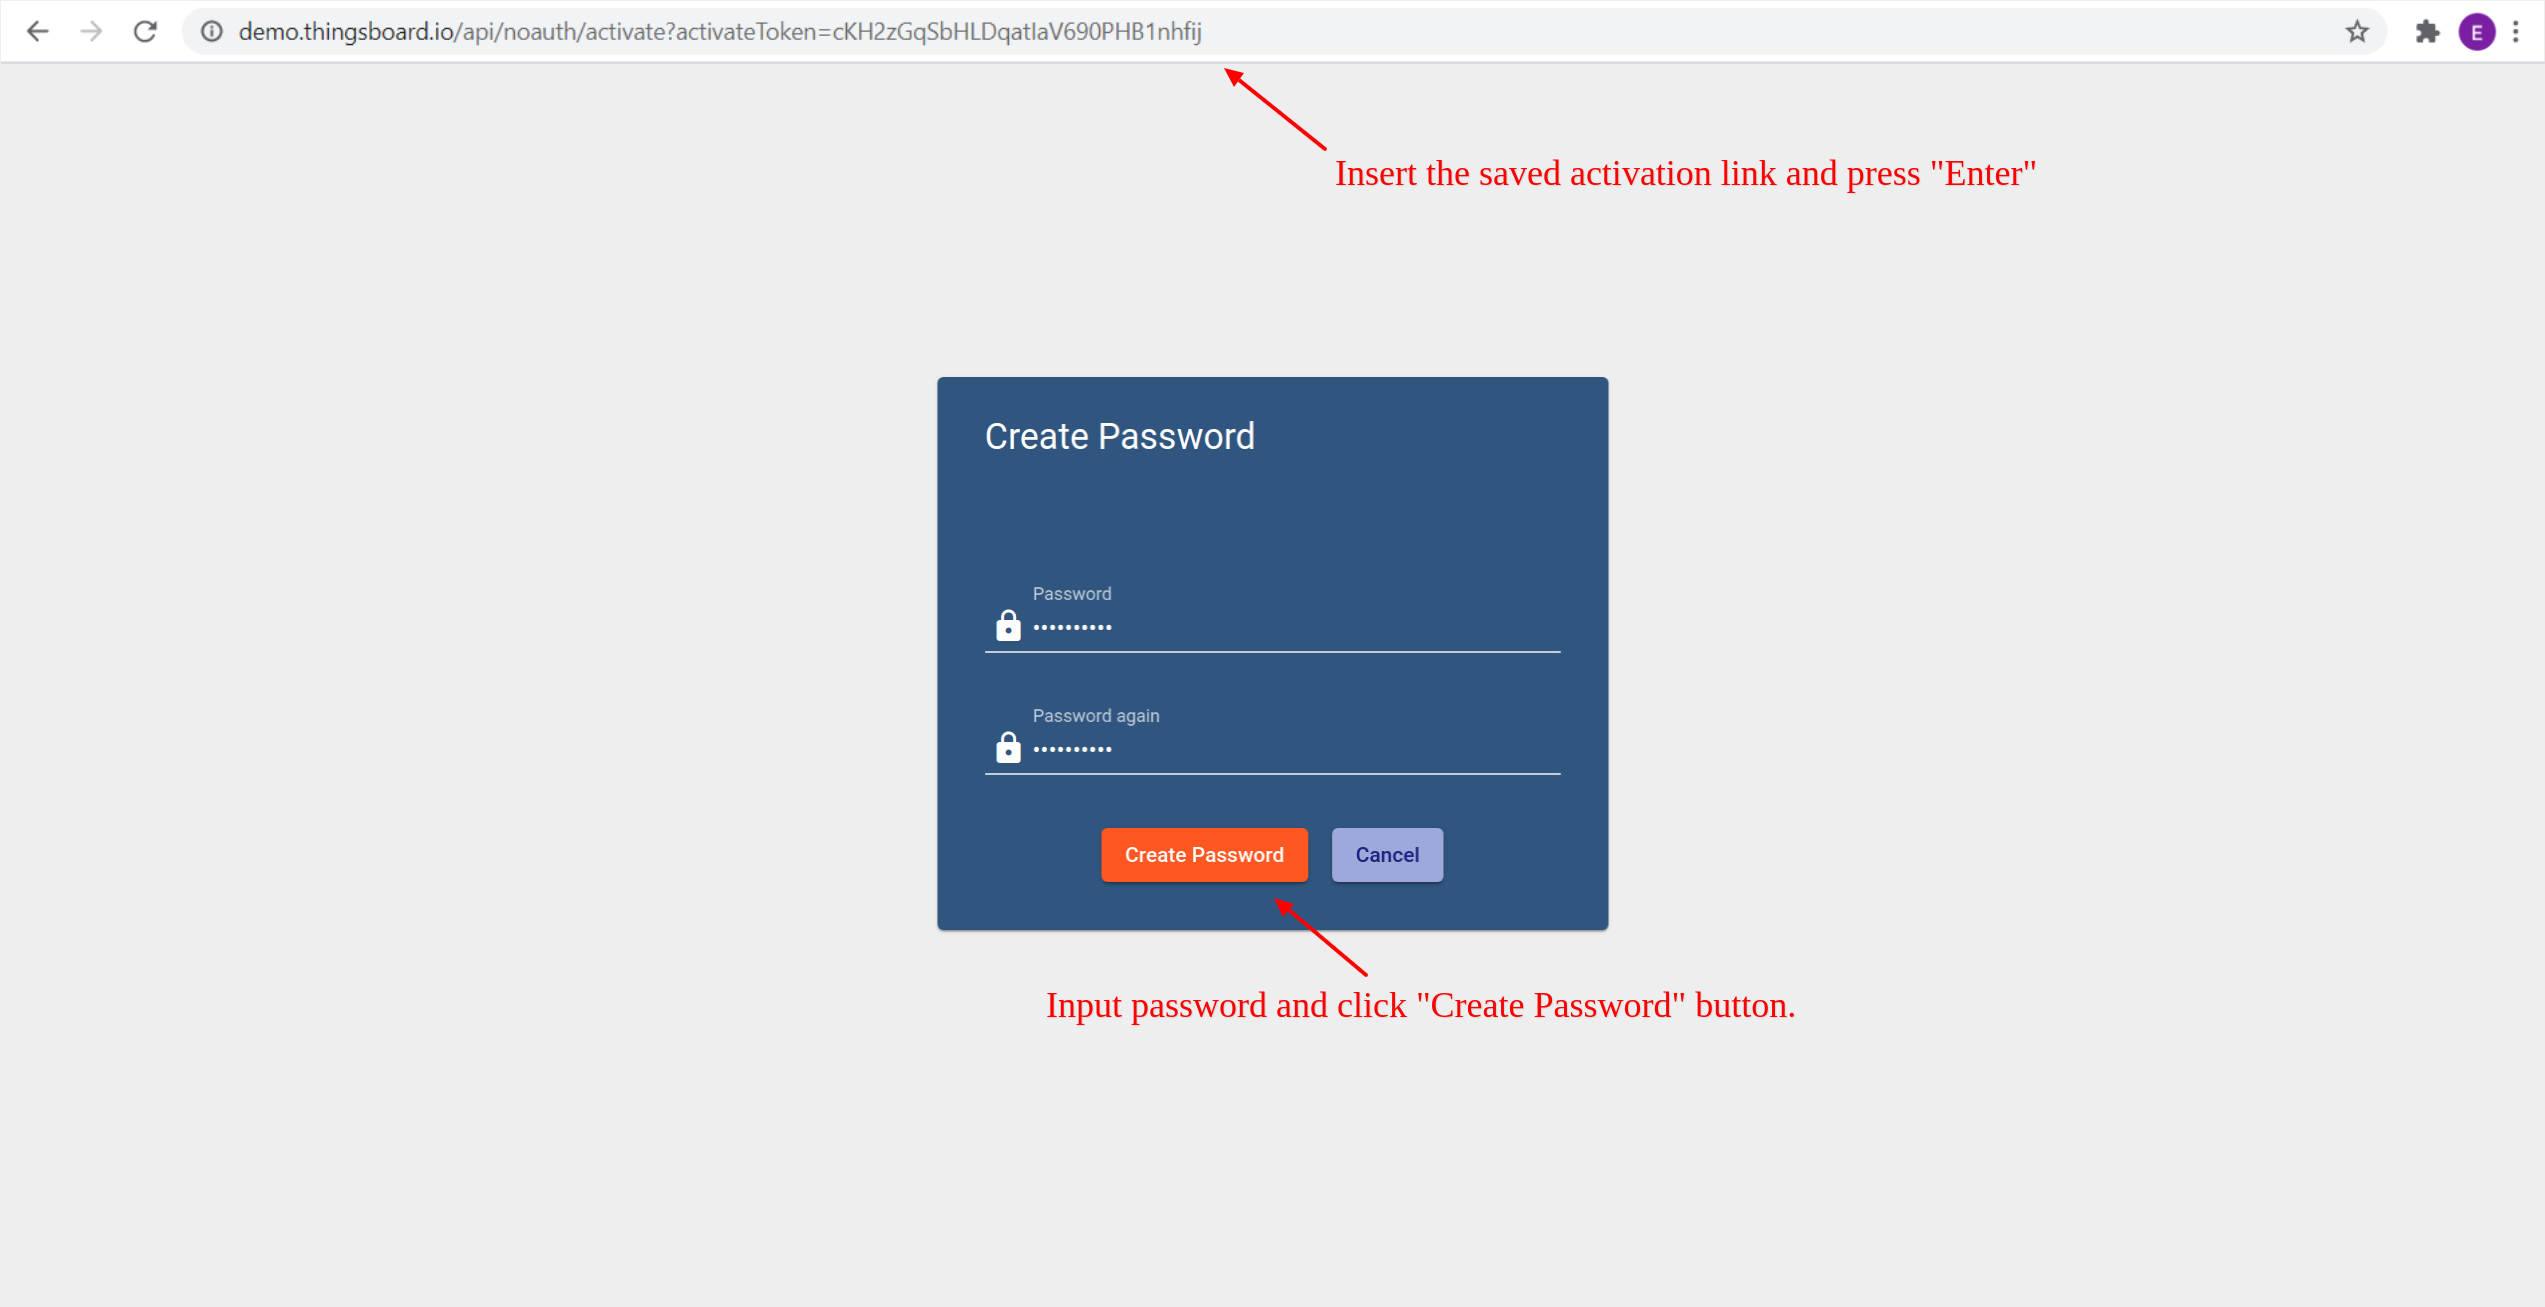
Step 7.5 Activate customer user
Use the activation link to set the password. Click “Create Password”. You will automatically login as a customer user.
You have logged in as a Customer User. You may browse the data and acknowledge/clear alarms.
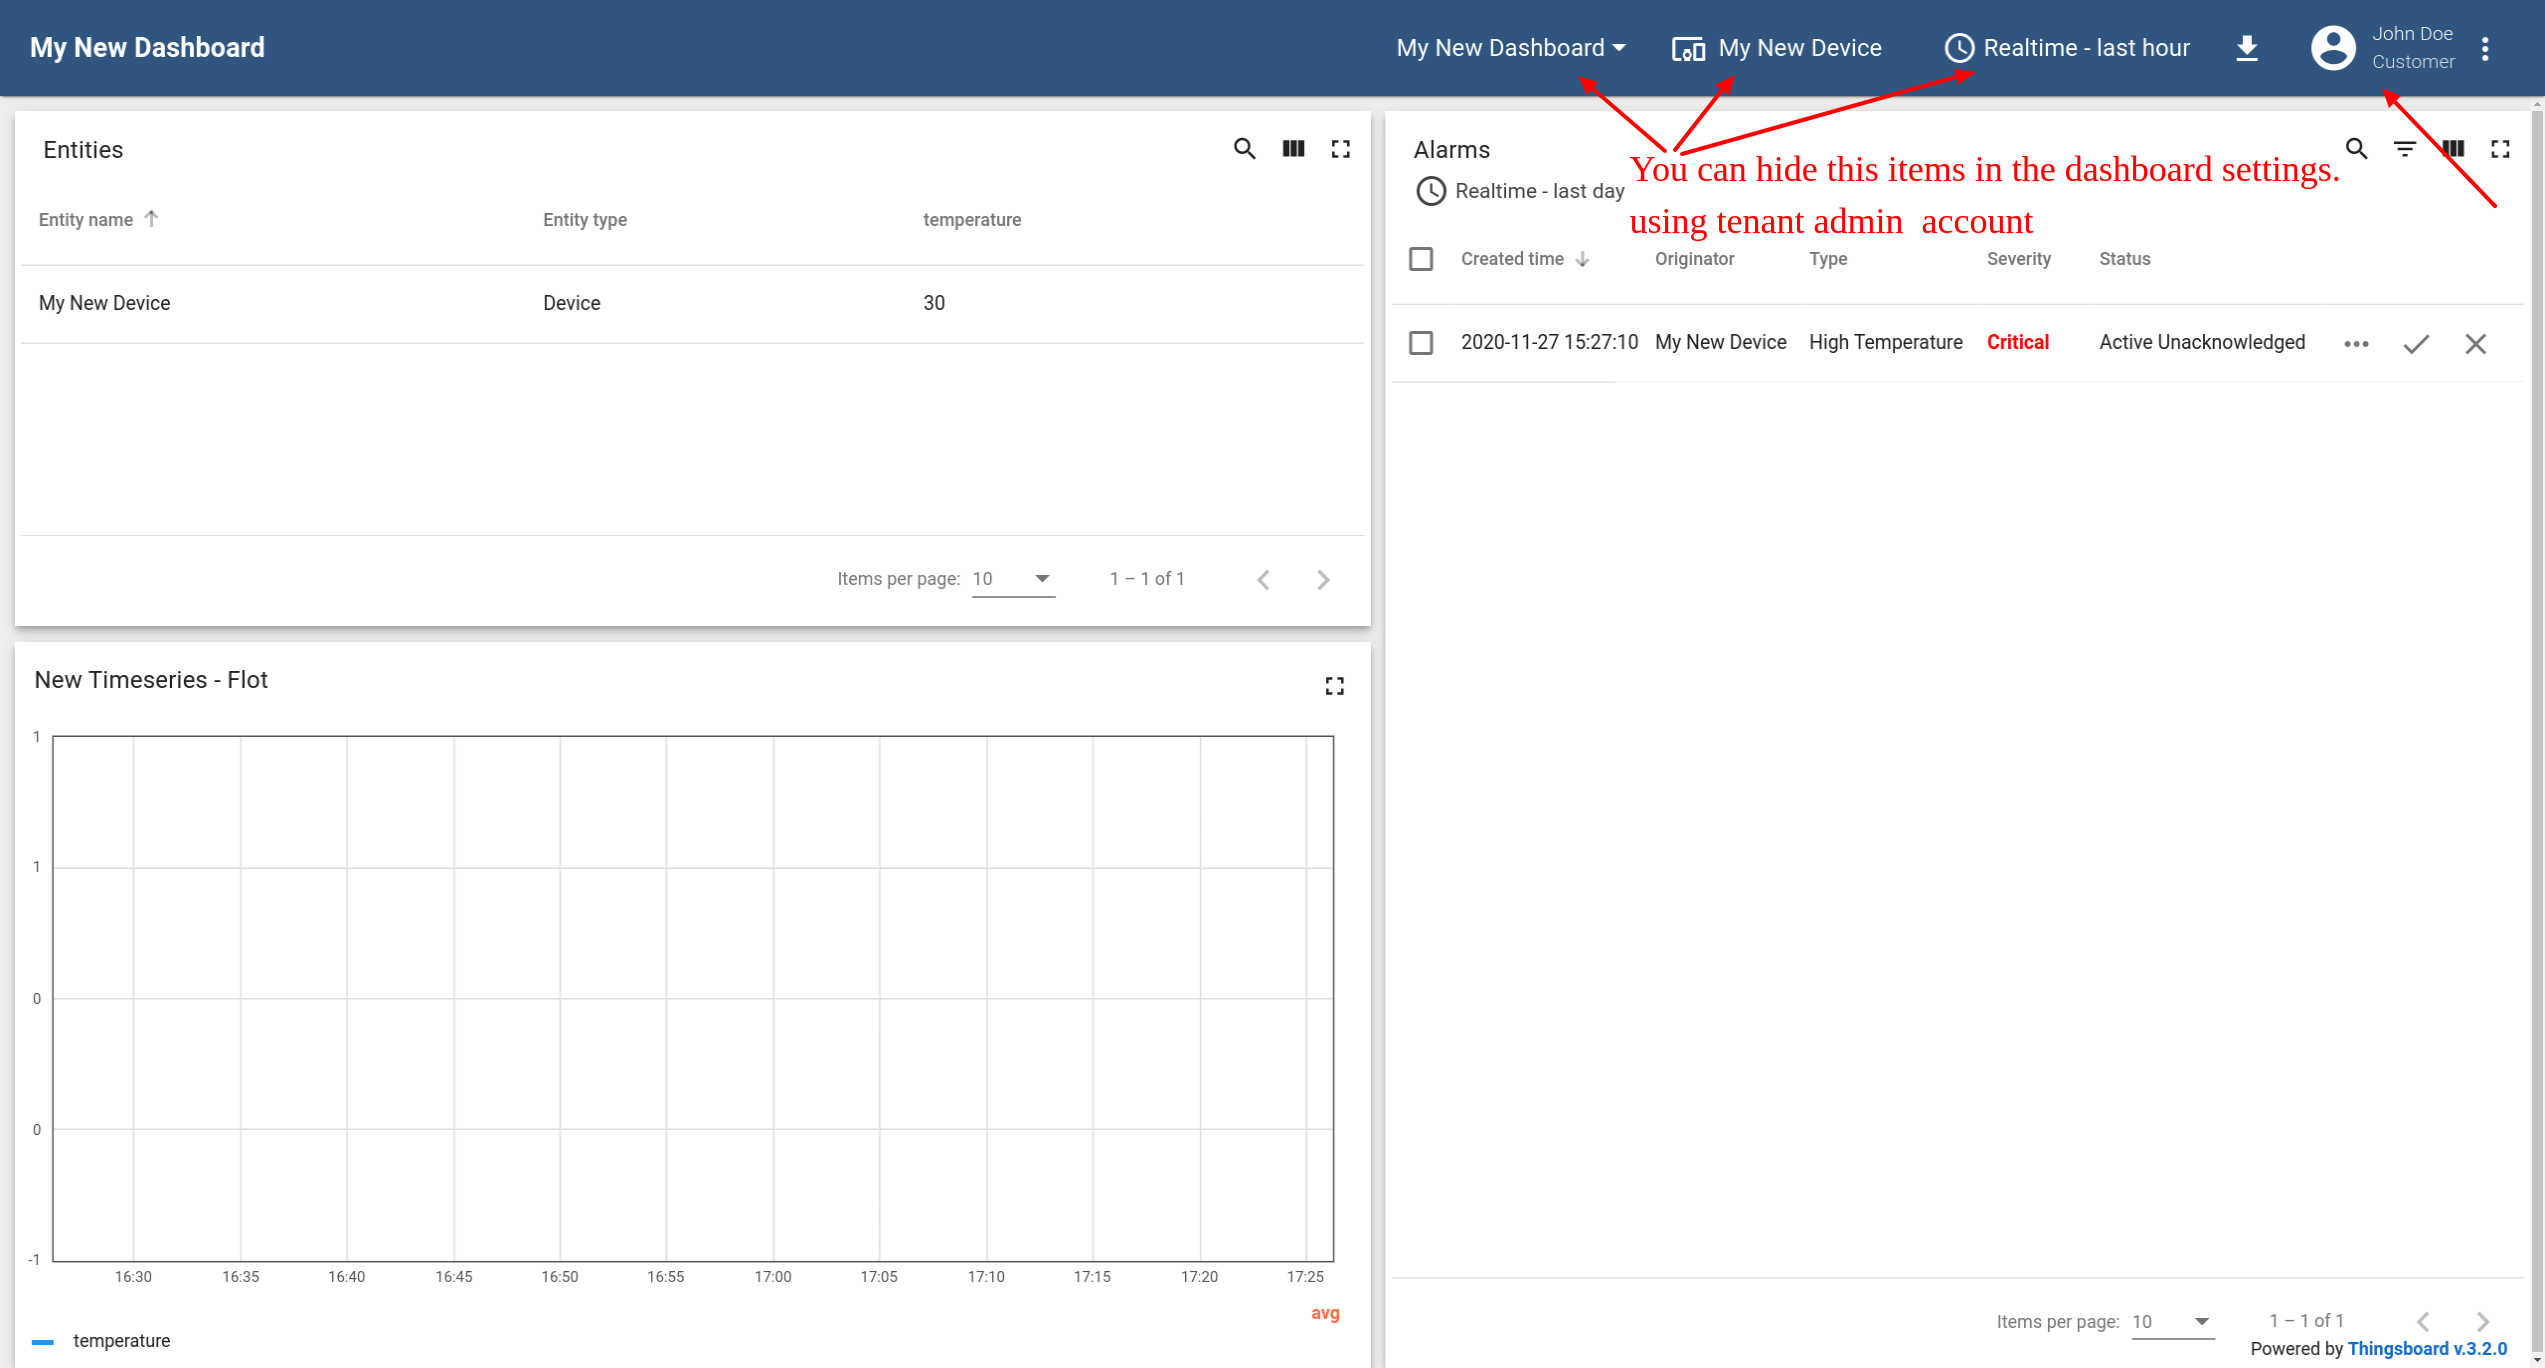
Step 8. Open Dashboards
Next Steps
Working with IoT Dashboards - Customize your Dashboard & Widget.
Getting Started with Rule Engine - Customize your event processing with Rule engine.
White-labeling - Customize your company or product logo with ThingsBoard PE.
Platform Integrations - Connect existing NB IoT, LoRaWAN, SigFox and other devices with specific payload formats directly to ThingsBoard platform.
Trendz Analytics - Converts the IoT dataset into insights and simplifies the decision-making process.
Mobile application - learn how to customize the mobile application.
ThingsBoard MQTT Device API | TA652FC-W MQTT API | TA652FH-W MQTT API - Connect Avantec HVAC device to your existing IoT platform.
See also
Installation guides - Learn how to setup ThingsBoard on various available operating systems.
Connect your device - Learn how to connect devices based on your connectivity technology or solution.
Data visualization - These guides contain instructions how to configure complex ThingsBoard dashboards.
Data processing & actions - Learn how to use ThingsBoard Rule Engine.
IoT Data analytics - Learn how to use rule engine to perform basic analytics tasks.
Hardware samples - Learn how to connect various hardware platforms to ThingsBoard.
Advanced features - Learn about advanced ThingsBoard features.
Your feedback
Don’t hesitate to star Avantec on github to help us spread the word.